Pages

Thursday, 6 October 2011

Autumn Leaves

Copyright RondayPhotography
"You know what's weird?"
"What?"
"Walking through dead leaves in flip-flops."

We did have a bit of an Indian summer this year (as I'm sure those in the UK have noticed) and during the heatwave I was comissioned once more to make a birthday cake for my Dad's friend A.  Previous inventions have included an apple-and-Calvados Arctic-themed thing, with meringue icebergs and marzipan polar bear; and last year, a chocolate-orange loaf stack with candied orange slices and candied peely squiggles.  This year I went for an autumnal vibe, because when I'm stuck for a birthday in autumn I go with Nigella Lawson and plump for maple syrup and pecans.  The cake will follow, but I decorated it with these.
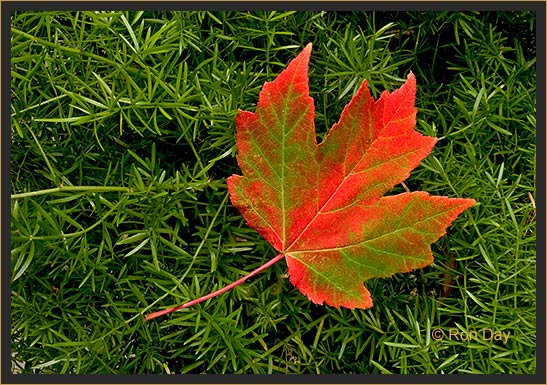
Autumn Leaves
You Will Need: Rolling pin, baking tray, greaseproof paper, dinner knife or specially-shaped biscuit cutter, chopping board and knife / food processor, cup, pastry brush

One slab frozen/ready-rolled puff pastry
Plain flour for rolling
Pecan nuts, finely chopped
2 egg yolks
Maple syrup

1) Roll out the puff pastry quite thinly - between 2 and 3mm thick.  Cut, using a knife or specialised implement, into the shape of mapley/chestnut/sycamore leaves, with 5 points, or single tear-shapes.  (n.b. Usually when rolling and cutting pastry, ones saves, balls up and re-rolls out the snippets left behind from the first cutting.  With puff pastry, which is made in layers, this process mixes the layers and causes second-round cut-outs to rise unevenly.  Save any leftover pastry for simple quiches and put it in clingfilm in the freezer.)
2) Lay the leaves onto baking trays lined with greaseproof paper and scattered with flour.
3) Beat the egg yolks in the cup to a uniform consistency.  Brush each leaf with yolk.
4) Chop or blitz the nuts (approx. half a packet for one slablet Waitrose' own puff pastry). Sprinkle over the egged leaves.
5) Very carefully drizzle a smidgen of maple syrup onto the leaves, being careful not to get any on the baking paper if you can.
6) Bake in a hot oven (200 degrees C) for 5-6 minutes, until well risen and golden brown.  When cool, remove from the tray and present or save on a plate to eat as biscuits or use to decorate a cake.  Don't worry if smaller leaves rise oddly and spill over themselves; you can eat those and hide your shame... nom nom nom

Tuesday, 4 October 2011

'A Little Promptu'

Such was the conversation which resulted in this little fellow, and actully a little friend for him as well...

He is a 'little promptu', or 'promptu' for short - and they are very easy to make at short notice - impromptu promptus!  He is an odds-and-ends creation using wool from making chicken-wattles, felt from Socky and cuddly stuffing from John Lewis (because all my cuddlies have quality inner cuddleness).  I was able to take all the tools and bits needed to make him to the slightly promptu barbeque in question, and whip up one for D in about an hour.

Little Promptu
You Will Need: Wool (half a ball or less of thickish stuff) knitting needles, 6mm; sewing scissors; felt; needle and thread; wool needle (with large broad eye for sewing with wool); stuffing.

1) Cast on 4 sts, leaving a long 'tail' of non-working wool.  Work 2 rows (the promptu is a stocking-stitch or smooth creature).
2) Increase at the beginning and end of row 3.  Work another couple of rows.  Increase at the beginning and end of the next row.  Continue increasing every other row or so until you have an even snouty triangle about 12 stitches wide at the needle.
3) Increase at the beginning and end of each row until you have 16 stitches altogether.
4) Knit approx. 3 inches on these 16 stitches; this will form the promptu's body.
5) Knit halfway across the row (8 sts).  Turn the work and purl these 8 sts.  Turn and knit 8. Cast off the next row, and leave a long 'tail' end.  Pick up the remaining 8sts on your needle and do the same on the other side.  These will form the promptu's legs.
6) Using the first long 'tail' from casting on, sew the promptu's snout together and as far down the middle of his tummy as you can get.  Roll his legs into little cylinders and sew down the inside edges with the tails from casting off, making a good strong seam in his groin and going up his tummy a bit if you can.
7) Cut out circles of black felt for the soles of his feet (not visible in the photo but very cute) and stitch them on with ordinary needle and thread.  Cut hands, with a slanting edge for the 'wrist' out of more felt and stitch them to the sides of his body.
8) Stuff your promptu tightly and fat!
9) With a new piece of wool if necessary, sew up the gap in your promptu's tummy.  Reaching his chest, make a strong stitch through his chin and pull his head down onto his chest.  Fix his head here firmly with a few more stitches.  Pass the needle through the back of his body to come out near his bottom, and cut off the wool to make a tufty tail.

Promptus have no eyes because I am lazy and they live underground like little moles.  But you could give them eyes if you like - very small beads or buttons.

Wednesday, 21 September 2011

Poultry Puppets


These poor souls have been off the blog since I made them, and I can't even remember when that was. It was definitely months ago, but then that's what you get for breaking your own digital camera and not visiting your brother often enough so he can provide piccies for you.  I insist on having pictures for knitted creations because otherwise the instructions *make no sense*.  Hence delay.  Apologies.

Unfortunately having finally got round to acquiring a picture at a lovely barbeque (with the beneficiary of the chicken modelling it beautifully in the background) I have now almost forgotten the instructions.  I was making the pair (yes, pair) of chickens up as I went along basically, fitting the sock to my own hand, so I can only give you a very rough guide indeed.  If you have any trouble and really want to know? I could work it out from the originals and message you, but you can't go far wrong here as they were designed to be pretty shapeless and crazy items.

Poultry Puppets
1) Cast on about 40 stitches, and knit a tube in the round on your double-pointed needles as far as you would like the puppet to extend below your thumb joint.
2) Turn the heel; the heel flap will go up the back of your hand
3) Make the gussets and decrease etc. according to the tutorials from Socky.
4) Based on how big you want the beak, decrease a bit into the 'toe'.  To join on the beak, alternate first yellow-body-body-yellow-body-body, then yellow-body-yellow-body, then all yellow coloured stitches.  Tie off the body wool safely.  For knitting in two colours, see Lizard.
5) Divide 2/3 of your stitches onto a 'top' needle, and the remaining 1/3 onto a 'bottom' needle.  On each needle, knit an hourglass shape, i.e. starting with many stitches decrease carefully on both sides to a point, then increase on both sides again to many.  Measure onto your fingers as you go along.  Cast off the finished hourglasses.
6) Stitch the hourglasses together into pouches which can fit your thumb and fingers into them.  Join the back of the throat together carefully - the lower edge of the top triangle to the upper edge of the bottom triangle, leaving holes for fingers and thumbs to get in.
7) Cast on 6-10 stitches in fat red wool, and knit two rows garter stitch (all knit sts both sides).  Follow Step 9 of Socky's ears to make a comb, possibly a little blunter than Socky's ears, and then cast on 5-7 sts and make two 'fingers' or spikes to make wattles.
8) Sew on comb, wattles and buttons for crazy eyes in appropriate places.  If wanted, get a bit of red felt for a rabid, pointy tongue.
9) BUUUUUUK!

Thursday, 15 September 2011

Cartacake, or Mappe-Monde on a Gateaux Projection


Since starting work at Jonathan Potter Ltd (shameless plug) I've made many rookie errors and seldom had a chance to show my appreciation and gratitude to the rest of the staff.  So when it started being my-birthday-time-of-year, I resolved to bring a cake in like we used to at school, and to theme it appropriately.

With one of us being on holiday, it needed to keep until he got back, so a fruitcake with plenty of integral booze seemed best.  This also gave me an excellent opportunity to use up some of the old dried fruits in the larder which had been giving me funny looks for years and threatening to go crunchy.

Map Cake
You Will Need: Large bowl, wooden spoon, scales, small bowl, fork, medium bowl, knife, sharp knife and chopping board, 24cm Springform tin, greaseproof paper, rolling pin, small plate, paintbrush, cup of water, plate for display.

3 medium eggs weighing 6ozs. total
6ozs. butter (Kerry Gold for preference, it squidges so well)
6ozs golden caster sugar
large handful of apricots, finely chopped
tablespoonful of mixed peel
a dozen glacé cherries, finely chopped
tablespoonful of currants, with any stalks removed
tablespoonful of sultanas
Armangac, Madeira, sherry or other cooking alcohol
6 ozs self-raising flour
2 ozs dessicated coconut
icing sugar
lump of marzipan
silver balls, food colourings
apricot jam

1) Preheat the oven to 180degrees C.  Grease and line the tin with a circle of greaseproof paper.  Set aside.  Chop all the fruit that needs chopping.  Put all the fruity ingredients in the medium bowl, and glug over a generous measure of the booze by putting your thumb in the neck of the bottle and drizzling as though you are a real chef.  This is quite fun, but only do a coating, not so you can see a puddle at the bottom.  Leave to soak.
2) Cream the butter and sugar.  Beat the eggs together in the small bowl with the fork, and mix well into the sugar/butter a third at a time.
3) Stir in the fruit and booze.
4) Weigh out the flour and coconut together and mix them.  Add to the cake mix a quarter at a time.  Fold in carefully to get lots of air bubbles into the cake.
5) Pour the mixture into the tin and spread carefully so that there is a slight depression in the centre of the cake.  As it rises this will fill out, creating a flatter surface to rest the cake on.
6) Bake until golden brown and cleanly skewered, about 35-40 mins.  Meanwhile, roll out a piece of marzipan into a circle big enough to cover the whole cake.  Use icing sugar to 'flour' the surface and your rolling pin.  On the little plate, blob food colouring like paint onto a palette and paint your design onto the marzipan with the brush.  Rinse in the cup of water.  You can't get much detail on marzipan; if I was doing this again I would make Royal Icing with eggwhite and use a smaller brush, but not everyone likes crunchy icing.  This was a cake for all.
7) Take the side-tin off the cake and flip it onto the plate for display, by putting plate on top of cake, grasping the tin-bottom firmly and turning over.  The tin-bottom and paper can now be removed.  When cool, spread the cake with a little apricot jam and lay the marzimap over the surface.  Trim any unsightly dangly bits with a knife.
8) Add capital cities or other places of interest with silver balls. 

Safe to say the cartographic content (and indeed the cakey content) was appreciated by all, which is gratifying.  And one of my rookie mistakes today (not getting a potential customer's name and number) came good too!  So, all is well in London Town for the beginning of another year...

Friday, 9 September 2011

Luxury Snacks for The Deserving


You can actually pay to go and stay in this house, as it's owned by the Landmark Trust.  I haven't been to this particular Landmark, but it makes an excellent illustration for a luxury pudding/snack/treat/vitamin C upgrade.

Boozy Pineapple
You Will Need: Chopping board, knife, pineapple, Cointreau, bowl, cutlery (optional)

1) Cut the pineapple in half.  Chop each end off.  With the big end against the chopping board, shuck off the skin carefully, pushing the knife blade away from you.
2) Cut each skinless half in half lengthwise, and carve out the hard cores in Toblerone shapes.
3) Chop the remaining fruit as you would prefer to eat it.  I am a pig so I did fat slices big enough to pick up with my bare hands.
4) Pile the pineapple into a bowl and slug a lot of Cointreau over it.  
5) OM NOM NOM NOM

Omelette of Queens
You Will Need: Knife, fork, bowl, small frying pan, spatula, butter, 2 eggs, some cream, some sugar, plate

1) Melt a small chunk of butter in the frying pan and let it froth.  Meanwhile, beat the eggs together with a generous slug of cream and a sprinkling of sugar with the fork in a bowl.
2) Add the egg mixture to the frying pan.  Cook on a highish heat without touching it until the edges are beginning to cook.  Scrape the bottom of the pan so that cooked areas ripple into view.  Leave it to cook some more, until there is about 3mm of uncooked egg sloshing around on top.
3) CAREFULLY turn the omelette over and cook another 30 seconds.
4) Flop the creation onto a plate, and serve hot with more scrapings of butter.


Monday, 5 September 2011

Flower Pressing


I had a good old Tidy last week, and was surprised and not a little pleased to find my old flower press and some of its produce tucked away.  The last time I moved house I went round the garden and took a sample of each plant as a memento.  Some of them pressed better than others - white flowers always tend to go brown if they're too fleshy - but I was able to construct a couple of pictures to remind me of past glories.  Last week I found the leaves I hadn't used yet, and reckon they could be kept for greetings cards etc.


I was lucky enough to be given a press, several layers of cardboard and blotting paper in a wooden frame with tightening screws.  You don't need one though - just some slightly absorbent paper to go beneath and above the flowers, a heavy book and another heavy book to weigh it shut.  Be careful how you lay the flowers, as they won't all open out beautifully once you close the pages over them.  Get a few of each kind so that you can pick the best-turned-out for your project.  It'll take a couple of weeks for them to dry out completely.  To stick them to something, use a very very fine scraping of PVA glue on the surface and a DRY, SOFT paintbrush to ease the petals down flat.  Lay them out in a plan before you get sticking, and try a few different arrangements. 

You don't have to make big pieces as above - a single blossom on a small piece of card can be tucked into a clear plastic keyring-dongle.  A silhouette portrait could be enlivened with flowers in the hair or as a border.  Elderly female relatives will appreciate your efforts as cards, and even a plain picture can become more of an abstract collage than a reproduction of a garden.  Don't forget that delicate leaves also work, especially variegated and feathery types.

Now that autumn months are drawing close, nab the last blooms of August while they last, and make them keep!

Wednesday, 31 August 2011

Blackberry Compote and Blackberry Diet Panna Cotta

Yes, it's that time of year again - or rather, given the amount of rain we've been having, it was that time of year again two weeks ago.  The blackberry season is over - tomorrow will be September, and according to the old wives, the Devil will be out pissing on them all making them shrivelled and sour tonight.  Not to mention the usual amount of pee at dog level.

It was moving into the boyfriend's mother's house which kept me away, and so when I finally got back to the railway 'towpath' at Wimbledon there were only enough berries for a single pudding.  Less than half a tub.  Pathetic.  I didn't even bother to weigh them.  I did however bother to eat them.  You could simply wash a meagre crop and make into a crumble or pie; I went for the slightly posher Blackberry Compost and Blackberry Diet Pannacotta.

Blackberry Compost
(Ok, 'compote' but it's supposed to have a circumflex on the O and that means 'missing S' and it's so much more amusing.)
You Will Need: Blackberries, caster sugar, small pan, wooden spoon, sieve, measuring jug, container.

1) Wash the berries thoroughly, and discard any ants or spiders.  Add to the pan and half-cover with cold water.
2) Bring to a simmer.  Dredge the berries with sugar - this is a generous drizzle which covers the entire surface in a layer 1mm-ish thick.  Stir.  Bring to the boil, and gently boil, stirring all the time, for 10 minutes.
3) When the berries have all turned red and the liquid is a lovely deep purple, strain the liquid using the sieve into the measuring jug.
4) You have some choices about what to do with the remains; they would add a little flavour to some pie or  vodka, but not much; I chucked mine.  Likewise, the liquid can be saved for decorating/saucing/tarting up gamey meats and desserts in a container, or used straightaway in...

Blackberry Diet Panacotta
You Will Need: Blackberry compote, equal amount of semi-skimmed milk, small saucepan, caster sugar, packet of leaf gelatine, wooden spoon, small bowl of cold water, smooth bowl or individual moulds, eggs, small bowl and whisk

1) Measure how much blackberry compote you have made.  I made 200ml of it, so you can use my proportions to scale up to how much of everything else you will need.
2) If 200ml of compost: Soak 3 leaves of gelatine in the bowl of cold water for five minutes.  Meanwhile,
3) Beat one egg in a small bowl.  Heat 200ml semi-skimmed milk to hot bath temperature and whisk into the egg.  Return to the pan and heat very gently indeed.
4) Add the compost to the milk and whisk to a smooth colour.  If you like, add another tablespoonful of sugar at this point for a sweeter dessert.  Allow this to dissolve.
5) Fish the gelatine out of the water and add to the compost mixture.  Stir over a low heat until dissolved completely, about 2 minutes.
6) Take the mixture off the heat to cool a while, and prepare your moulds.  I used a smooth, laquered tin pie dish for my little experiment but it struck me that the silicone muffin cases you can get nowadays (in Lakeland, yay!) would be ideal for cute individual puddings.  Pour an equal amount of mix into the moulds and leave to chill in the fridge for approximately four hours.
7) Turn the pannacotti out onto little plates, garnish with a few blackberries if you have any good ones left and a dribble of red wine Creme d'Mures.  Serve with vanilla ice cream.

The preceding dessert is a little liver-coloured which is why garnish is so important, but tastes deliciously cool and fruity.  Because the milk is semi-skimmed and there's so little sugar in it, it's relatively suitable for those watching their figures.  Unless you dump in the optional extra sugar.  Or use single cream instead.  Both of which I will be trying as soon as I'm not in a dieting household...

Sunday, 21 August 2011

Hangover Omelette

So, on Friday night I went out.  To make new friends, who knew some of my old friends.  It's a simple concept - you all arrive at a pub, share a table with some strange faces and at the end of the night - two pints of cider, a double Amaretto, and a lot of ill-advised conversations about one's personal life - you invite them back to your house for some Sloe Gin.

That night you remember that you are drunk, and very so, because it has now been Saturday for four hours.  So you drink a lot of water.  Nevertheless when you get up on even-more-Saturday morning, you have a headache and not a lot of motivation.  I prescribe:

1) Lots of water, and no caffeine - coffee and tea are diuretics and will make you more dehydrated.
2) Fizzy-good-make-feel-nice (alka-selzer) or paracetemol, for the immediate problem.
3) Hangover omelette.  You Will Need:

2 eggs
a splash of milk
bowl
butter
stirry spatula
leftover potatoes (or something)
sharp knife and board
frying pan
ketchup, to serve if desired

Melt a large knob of butter in the frying pan.  Slice the potatoes if using and fry them in the butter until browned and sticking annoyingly to the pan.  Add more butter.  Beat the eggs with a little milk in the bowl, and tip them into the hot pan.  Allow them to cook undisturbed for a minute, then try to turn over sections of the omelette one spatula at a time.  Shuffle the resulting chunks of eggy potatoey goodness around a bit until cooked through.  Flop onto plate.  Reflect dizzily how lucky it was that you didn't throw up, as that is what this creation reminds you of.  Put ketchup on it.  Remember to get a knife and fork out of the drawer to eat it with.  Serve with more water and a side of remorse.

4) Go back to bed to think about what you've done, and add some people on Facebook.

Tuesday, 16 August 2011

How To Throw A Dinner Party As Far As You Can


Tonight in the name of Friendship, Love, Career Prospects, and all good things, I am throwing a dinner party for the boyfriend, myself and two very good friends with Rather Good Jobs which I hope will rub off on me.  The food has been calculated to delight the eyes (male friend) the palate (female friend) the stomach (boyfriend) and the nerves (me).  Calculated is the right word; like the Bistromatics in Hitchhikers' Guide, dinner parties have their own ratios, sums and correlations which must be measured before you can start.  Once you have your totals, you can throw a dinner party like a Lithuanian shotputter, which is to say well.

step One: Calculate the relationships between all the people you wish to invite, and subtract or add until everybody has at least one person to talk to.  When introducing a new person to a group, calculate the contents of the group so as to include your most welcoming and outgoing friends, so as to involve the new person automatically.

step Two: Work out what you want to make.  This involves several variables:
-Dietary requirements, including allergies and so-and-so who say they hate cream and are therefore not a human being
-Time to prepare.  Starters where possible should be cold and made the night before, or easily reheated before guests sit down (e.g. soup).  I have made things difficult for myself by making a cook-on-the-day starter, but it looks posh and comes with a preparable-ahead and impressive sauce.
Main courses should be started before guests arrive and ready by the time you've finished starters.  Time the arrival of guests and amount of booze available accordingly.  Once again I have broken my own rule by making something which will need to be prepared while starters are still happening for everyone else.
Puddings should always be reheatable at a moment's notice, to go in when the main course comes out, or cold and prepared the night before.  This time I have managed to obey; the pudding is already only awaiting presentation.
-Faff.  The Faff Index is personal and varies greatly.  A general rule of thumb is that you should never expend more Faff on a dinner party than 7:5, where 7 is party and 5 is your usual tolerance when cooking for yourself.
-Cuisine.  It's often nice to have all your dishes from the same area, like Spain or Italy, as it creates a Theme (i.e. Posh) and means you can use all the same cookbook.

step Three: Calculate the amount of food needed.  This is not the same as the number of people; some (like me) can only manage halves of everything (but being hostess I will tolerate leftovers.)  Boyfriends on the other hand usually go back for seconds.  Most people will eat more main course than everything else, and more pudding than they say they will. The sums are something like this:

Size of portions of courses is inversely proportional to the number of courses
Size of portions of courses is inversely proportional to number of eggs/floz cream used in meal total
Size of portions of courses is inversely proportional to the poshness of each course

Let Starter= s.  If S=1, Main Course =2 and Pudding (P) = 1.7 (Oh, Go On Then, Just A Slither).

step Four: Shopping For Posh
Regarding the Faff Index mentioned earlier, you can reduce the Index whilst increasing the poshness of your meal by adding what is known in my family as 'Garnish, that's what that is.'  For example:
-slices of citrus fruit, thin, cut along a radius and twisted to stand on things
-corainder, parsley or mint sprigs, or chopped and sprinkled chives
-grated chocolate off an ordinary large-hole cheese grater
-cream, oil, condiment or balsamic drizzled in an artistic drizzle
-chillies cut on the diagonal to reveal the seeds
And, my personal favourite and trick for this evening:
-Colourful, foreign and where possible tiny vegetables, and a variety of them.

step Five: Schedule, Schedule, Schedule!
You don't have to be all 'T-minus etc. eighteen hundred hours' about this, but do work out before you start what needs doing in what order.  Then when you're turning back to the cooking after five minutes talking and drinking gin, you won't have really forgotten where you are or what you're supposed to be doing.

Let's see how it goes...

Tuesday, 9 August 2011

Toast

Since the boyfriend and I both started our new jobs, it has been imperative that a quick and Simple breakfast be devised which can be eaten together at the extremely stressful time of day, known as When The Today Programme Is On Radio 4.  He has gone for a mushroom omelette, being a manly man and requiring cooking.  I have settled for the default of the nation.
Toast.
It's one of those delightful English words which is both a noun and a verb -  a Make and a Do.  Perhaps the simplest Make/Do of all.  The words 'I can't even make toast' are known to be a lie (always) and excuse to get out of cooking/healthy eating the English-speaking world over.  How to make really nice toast just the way you like it however is a little more of a struggle, and requires personal experimentation.
From Vogel's website

I have always had to balance the desire to make perfect toast (which has in my humble opinion to be white bread, for that golden-brown look) with my desire to make perfect sandwiches, which vary depending on filling but generally call for more 'interesting' bread.  Vogel's products, pictured, in their green-and-purple or red-and-yellow striped packets, are a good compromise.  Burgen also do a seedy loaf with slightly larger, whiter slices.  Each loaf can keep me in toast (2 slices) and sandwiches (2 slices) for the vast majority of the working week.

Seedy bread is a great way to eat slightly better and tastier food without having to go down the brown bread route.  It doesn't feel like brown bread, which even home-made can have a slightly dusty taste to the crust; with jam, marmite, smoked salmon, hard and soft cheese the little niblets add texture and vitamins without impacting much on the overall 'white' taste of the bread. 

Seedy stuff also makes good eggy bread, or 'French toast' as they call it across the pond.  Take 1/2 a beaten egg per slice, dunk the slices in the egg so they're soaked all through, and fry in a chunk of butter.  I've had eggy bread with ketchup, or maple syrup and bacon, or sugar for pudding.  Yum.

Now all I need to work out how to do is get up at 7am!

Thursday, 4 August 2011

Twitter - The Surrender

I had told myself that I would never get a Twitter, that it was a pointless waste of everyone's time, and that I couldn't understand it.  But that was in the early days, when everyone's Twitter was 'going to the loo' 'on the loo' 'reading the paper.'  Now it seems to be all about the linksharing, and after familiarising myself with its uses for work, I realised that having a Twitter feed could, actually, serve me well.

I often find myself collecting items for a project, thinking about a project, or doing something tiny yet creative which doesn't merit a full blog post.  For these snippets - such as the 'invention' of DIY egg mayo which formed my first post - Twitter is an ideal repository.

There are also several websites and resources which I use/rip off/exploit whilst seeking Simple Dos, which I could use Twitter to share much more efficiently than just posting them on here.  It's also an opportunity to do some ruthless self-plugging of this site whenever I post something new, which will hopefully increase traffic and therefore creative goodness vibes in the general population.

You'll be able to see my last 3 tweets on the right-hand side of the blog now, thanks to a cunning 'gadget' available through Blogger.  Points for Blogger modders.  I encourage you all to follow me, simplymakeanddo, and make this work.  It's a co-operative effort, people!

Borscht


This is really a post about leftovers, especially garden leftovers.  Whilst (very sadly) unable to grow my own vegetables, I was bequeathed some home-grown things by the boyf's mother what was probably weeks ago now.  The potatoes and beetroot have kept well in the fridge, being roots which could traditionally keep a whole winter in a freezing Lithuanian cellar.  It is time they were used up.

It was (as usual) stepmother N who introduced me to borscht as a concept for home cooking; having previously thought of it as something foreign to be perfected by restaurants, I have now realised it to be as perfectable and yet homely as Momma's Apple Pie.  A quick search for a basic recipe on the Good Food website turned up some VERY angry commenters, each of whom had a different 'authentic' take on what is a national dish for about 9 different nationalities.  Given how little I have left in the fridge of any suitability, and my woeful lack of Eastern European ancestry, I present to you my riff on borscht - or what might be called Boish - 'almost Borscht', for the purists.  All nine of them.

Boish
You Will Need: Large pan, wooden spoon, large-hole grater, kettle and measuring jug, chopping board and sharp knife, potato peeler, apron or unfavourite clothes to wear (beets are super-purple), large dinner spoon and bowl :)

Knob of butter
Red onion
Two beetroot
Three potatoes, medium-sized
One sad tomato (as opposed to very fresh, happy tomato)
Remains of head of savoy cabbage
One teaspoon Bouillon veg stock powder (from all good retailers)
750ml boiling water
Approx. tablespoonful tasty vinegar
(sour cream optional serving suggestion - I didn't have any)

1) Peel and grate the potatoes and beetroot; chop the remaining nubs finely.  Set the striplets aside.  Peel and finely chop the onion.
2) Gently fry and soften the onion in the pan, with the knob of butter.  I use lightly salted butter for all my fat requirements nowadays, as it goes with pretty much everything, especially toast.
3) Boil the kettle.  Make 750ml of stock in the measuring jug with the Bouillon powder (that's a brand, and a good one, but it doesn't matter what you use.  It's best of course just to always have stock left over, but that's another story.)
4)  Add the beetroot and potato to the onion, and let the potato go purple before adding some of the stock.  Bring to the boil, then reduce the heat to simmer.
5)  Finely chop the cabbage and tomato.  Add to the soup.  If it looks too chunky, add more stock.  SImmer for approx. 25 minutes, or one episode of 30 Rock.
6)  At the last 5 minutes before it's ready, add some red wine vinegar to taste.  Borscht is characterised by a sour taste, which is what the optional cream is for taking the bite out of.
7)  Serve hot or chilled, blended or chunky - although chunky is more authentic, and involves slightly less washing-up.  If you're feeling really posh, put some dill or lovage on the surface and get admiring cheffy glances from your co-diners.