Pages
Sunday, 22 July 2012
Thought Processing Food
One of the reasons I still slightly despair of the Man occasionally is that he doesn't have the 'what have we got in the fridge' skill. He has no concept of what is likely to be in the cupboards at any one time, and what this means. If I leave a fridge 'full of vegetables' as he puts it, he will go out and buy ready-made pasta and sauce. Which means that by the time I get back, some of the veg is past its best.
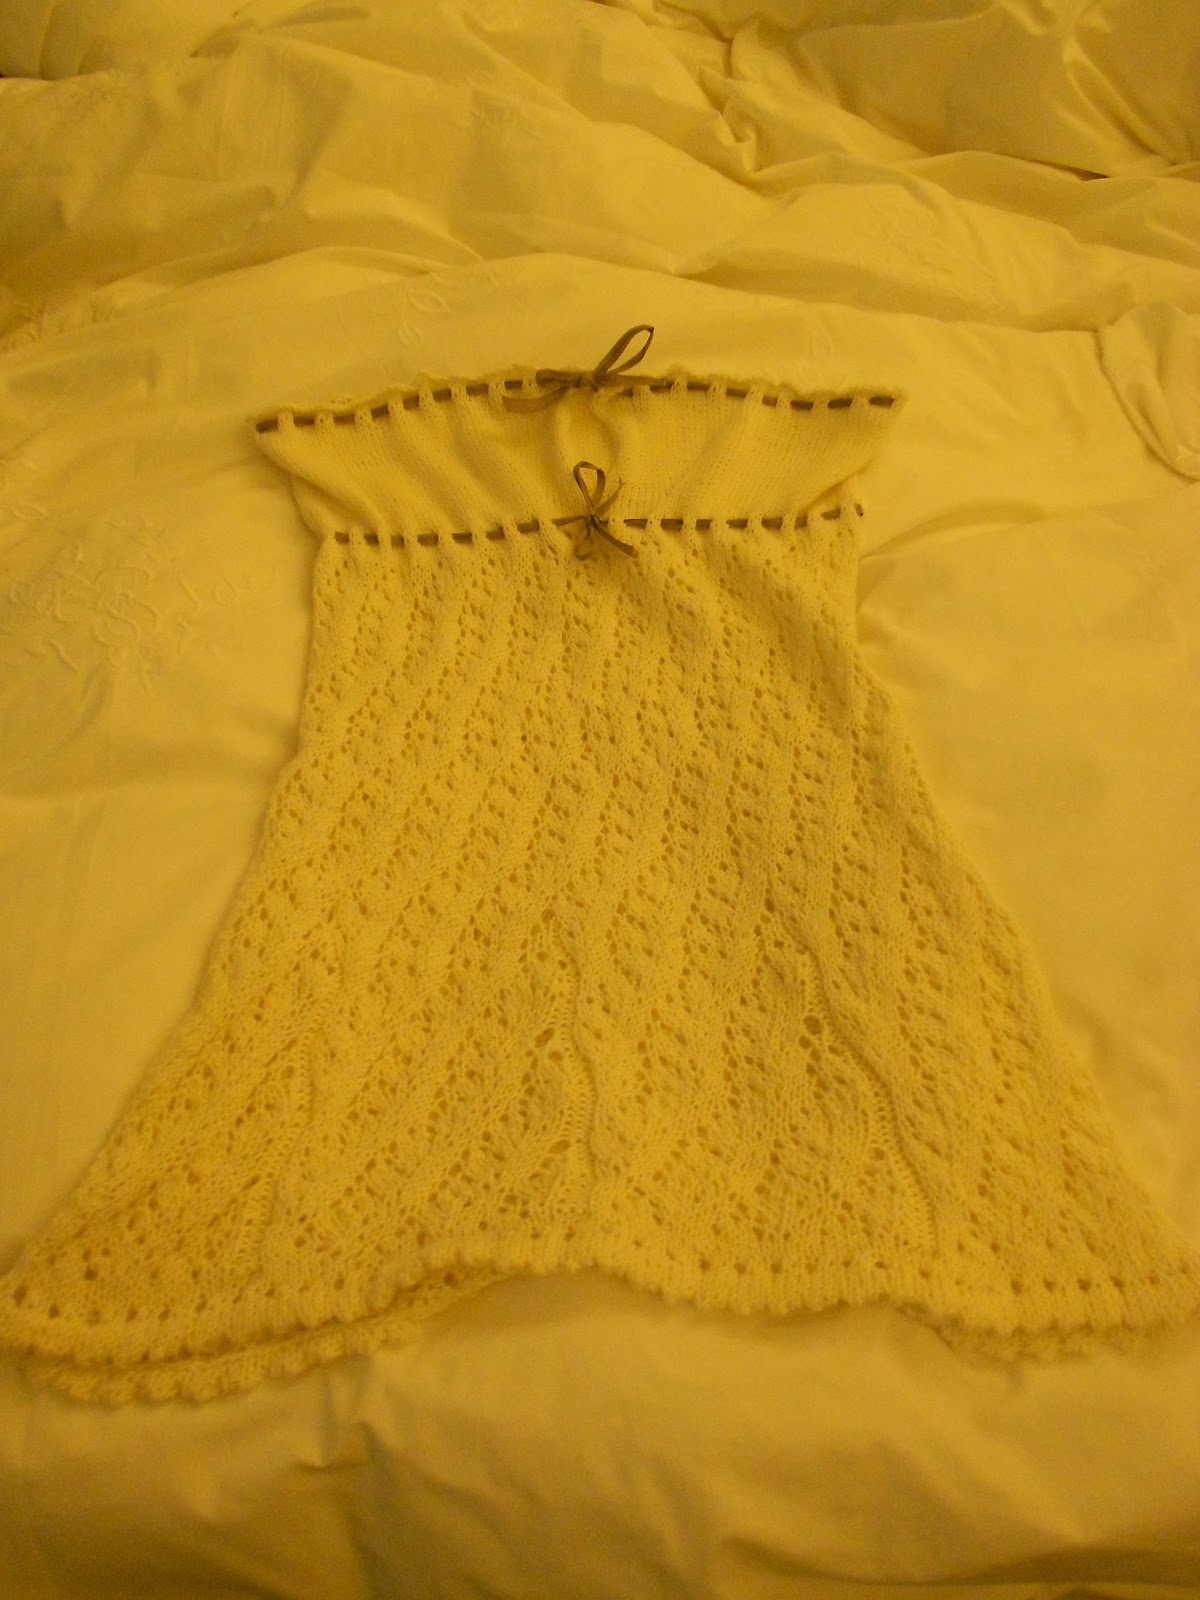
I haven't been crafting much recently; there's a frock I adapted from a pattern which needs finishing, but I've run out of cream cotton. So I thought I'd fill the airwaves with a train-of-thought recipe, so that you can see what whipping something up looks like. It's half inspiration and half being prepared.
What Have I Got In The Fridge?
A couple of days ago, when I went shopping, I got a butternut squash and one of Waitrose's large bags of individually-wrapped chicken breasts. These bags of chook would be a true lifesaver if there were any room in the communal freezer; as it is, I had three breasts left. That sorted the meaty angle, as I had known it would when I got them.
There was only the large bulb part of the squash left. A couple of days ago, I had chopped the top off, peeled and cubed the tubular section, steamed the cubes in the microwave for 10minutes and then chucked them in the oven with some rosemary to get a bit roasty and interesting. At the same time, I peeled and de-seeded the main bottom section of the squash and clingfilmed it. I had expected to need the whole thing at that meal, but now I had a big hollow thing I had to stuff it.
Luckily I also had a few sprigs of rosemary and a few cloves of elephant garlic left over as well. Elephant garlic is, I have decided, a useless thing. It takes forever - I mean forever - to roast through, and when it is cooked it tastes so much milder than real garlic. It had been a present from the Mother-Out-Law, who meant well; and then another one turned up when I wasn't looking. It might make a decent centrepiece if cut across the middle of the bulb, doused in pepper, sea salt and olive oil; but right now the few leftover roast cloves were chopped and went in the food processor with two torn ends of brown bread from last week's sandwich loaf, and the rosemary.
The bulb of squash I halved, rubbed with 2tsp of olive oil and set to roasting cut-side down for about half an hour. Meanwhile I processed the bread, and got out the third of a bulb of fennel I had found in the fridge.
Fennel is a wonderful thing. Like white wine and lemon it is equally happy with chicken or fish, and comes with a free bunch of green 'garnish' if you're feeling posh but don't have any dill. Chopped, with a finely chopped red onion and a smidge of olive oil in the pan, it caremelises beautifully. The smell of softening fennel-and-onion in olive oil will always remind me of Saturday pasta nights with my father. It is the smell of an Italian curryhouse, if such a thing were to exist - hot, fragrant, exotic. The Man dislikes its liqorice taste usually but a little wouldn't kill him. Mixed with the crumbs it would beef up the filling for the squash.
Half a courgette found snuggling up to a spot of broccoli made the green for the meal. My art teacher used to walk past people's plates in the canteen putting cucumber on their plates 'to balance their palette'. You should almost always have something green going on. Tha's vitamins that is.
Also in the fridge was half a bottle of ready-to-use tomato passata, which makes for a very bland pasta sauce and an excellent inspirational base. Three teapoons of harissa paste and the juice one one lemon made it fit to cook large chunks of chicken in. The squash halves, turned hollow-side up and filled with filling, roasted another fifteen minutes while the chicken warmed through and we were ready to go.
So there you have it. The secret to last-minute relatively luxurious suppers is: buying portions of meat in bulk; always having vegetables and seasonings to hand; red onions; flavourings in jars of the sort which never go off (harissa, chilli paste, curry paste, capers, anchovies, mustard) and olive oil or butter, which in small quantities make everything better.
Monday, 9 July 2012
Knitted Baby Jumper Pattern
I say pattern. Really this jumper is an experiment and a mess and I have no idea if the proportions are correct for the average baby of whatever age. I just wanted to make something nice for the boss' first grandchild, and a teeny jumper seemed like the way to go. I would follow a pattern, but they all rely on specific gague and I utterly cannot be arsed to find the wool/needles to fit a gague when I have non-matching wool and needles waiting to be used. So I made it up.
![]() |
| Use these patterns for the contrasting details. |
I think modelled on the man's teddy it looks a bit like a biker jacket. Hopefully on the real Baby Boss it will look just as cool but in a less odd way. Colour was intentionally picked to be gender-neutral, as were the barbed spear/flower patterns on the borders and back.
Baby Jumper From Scratch
You Will Need: Needles 3.5mm, 2 colours of soft DK wool, at least 2 balls of your main colour; 3 small buttons, darning needle (with really large eye), scissors.
Back
Cast on 45 sts.
Row 1 purl.
Six rows of 5 knit 5 purl ribbing.
Knit in stocking stitch until 3 inches long. Insert the large flower/toothy ethnic pattern in a sympathetic colour of the same kind of wool. Finish pattern and continue in plain stst until the whole thing is 7 inches long.
Round off with another six rows of 5 knit 5 purl ribbing.
Cast off.
Front - No Buttonholes
Cast on 25 sts.
Row 1 purl.
Six rows of 5 knit 5 purl ribbing.
3 rows of plain stocking stitch.
Follow the pattern below for the border in your contrasting colour.
Knit another 2 rows of stocking stitch.
Begin decrease rows: begin every knit row with a knit-2-together until you only have approximately 10 stitches. Check for length against your back piece - the front should come up to the bottom of the ribbing.
Finish the front with 6 rows of 5 knit 5 purl ribbing.
Cast off.
Front - with Buttonholes
Cast on 25 sts.
Row 1 purl.
Two rows of knit 5 purl 5 ribbing.
Button row: knit 2, yarnover, knit two together, knit one, finish the ribbing as usual.
Three rows of ribbing.
Button row: stitch two stitches, yarnover, stitch two together, finish the row.
Two rows of stocking stitch.
Insert the pattern; in the third pattern row, add a further yarnover and decrease stitch two stitches in.
Just after the pattern, before you begin the decreases, add another yarnover and decrease stitch two stitches in.
Complete the decrease rows and ribbing to finish, with the two fronts the same length.
Cast off.
Sleeves x 2
Cast on 20 stitches.
5 rows of knit 1 purl 1 ribbing.
3 rows of stocking stitch.
Insert the pattern for the border. In the sixth row of the border, increase 1 at both ends of the row.
*Knit five rows of stocking stitch, then increase the next row at each end.* Continue this pattern until your sleeves are as long as the back is wide.
Assembly
Weave in any loose ends from the different colous on each piece, using the appropriate method for your needle. Using as much of your cast-on and cast-off ends as possible, seam the long edges of the sleeves. Join the top edge of each front to the back, and seam around the round edge of each sleeve. Finish off by joining the back to the fronts, putting extra strong stitches in the armpits which go / \ - across the seams on every piece. Sew on the buttons, using a thin strand untwisted from your main wool colour as thread so that the stitches are invisible and strong. (I hadn't done the buttons when these photos were taken). Do up the buttons and you're ready to hand it on!
Tuesday, 19 June 2012
Victoria and Albert Sponge (and edible flags)
| what a pavlova (oh, pun!) Note pink lemonade to right, very appropriate |
The 'Albert' in this otherwise typical sponge comes from the German-themed grated apple and cinnamon in the mixture. This does cause it to densen dramatically but I got no complaints as to taste. Next time perhaps more sophisticated fruit-layering could be arranged.
Victoria and Albert Sponge
You Will Need: 23cm cake tin, greaseproof paper, scissors, large bowl, wooden spoon, small bowl, teaspoon, scales, whisk, cheesegrater, veg peeler, chopping board and sharp knife, spoon, baking tray, breadknife, serving plate, plate, dinner knife (skewers / cocktail sticks, cotton bud or clean paintbrush)
6 eggs
self-raising flour
butter
sugar
2 Bramley apples
3 tsp cinnamon
red berry jam
1 punnet strawberries
250ml double cream
(rice paper, food colouring)
1) Preheat the oven to 180 C. Line your tin with a circle of greaseproof paper and smear the sides with butter.
2) Weigh 4 of your eggs (reserve the other 2). Weigh out and beat together 4 eggsworth of butter and sugar. Beat the 4 eggs together in a small bowl; gradually add and mix them with the butter.
3) Peel the Bramleys and grate them into the mixture. Mix. Weigh out 4 eggsworth of flour, add the cinnamon, and gradually fold it into the mixture a little at a time.
4) Pour the mix into the caketin, and make a dent in the centre - then when the centre inevitably rises, your cake will be flatter overall. Protip. Bake approximately 45mins - 1 hour, with a tinfoil hat for the last 15 minutes if need be, to clean-skewer stage.
5) When your cake is done, take it out of the oven and whack the oven up to 200 C. Hardcore. Allow the cake to cool. Clean your large bowl. Separate your remaining two eggs, getting the whites into the large bowl. Whisk your eggwhites until they are at stiff-peak stage - when you lift the whisk, the points that form should be rigid. Beat in approximately 6 tablespoons of sugar one spoon at a time, until stiff and glossy.
6) Cut another circle of greaseproof paper the same size as your cake, and lay on a baking tray. Spoon the meringue out over this circle to almost cover it, forming a 'nest'. Bake at 200 C for 10 minutes, then turn the oven off.
7) Wait at least 2 hours. Watch a film, play a game, make lunch, whatever.
8) De-tin your cake. Place it on the serving plate. Carefully saw the cake in half, and shift the top half onto a second plate. De-oven your meringue nest. Carefully transfer the meringue from the baking tray to the top cake-half, peeling off the greaseproof paper. It will be quite soft and sticky.
9) Chop 2/3 of a punnet of strawberries, and whip all the cream to soft-peak stage (when the peaks wilt). Spread jam on the lower half of the cake; follow with half the cream, and strawbs to cover. Lift the top cake on. Fill the nest with the rest of the cream, and decorate with the remaining strawbs, leaving small ones whole and un-hulled.
10) If flags desired: Tear a sheet of ricepaper into rectangles. Make a shallow fold at one of the short ends; wet the edge of this fold and fold across a stick. Press firmly to glue the paper together around the stick. Paint designs on with food colouring.
Protip: Rice paper is edible, but not very tasty. This fact was rediscovered multiple times, often by the same people twice.
Tuesday, 12 June 2012
Afternoon Tea Cakes
The other weekend, for the Jubilee, I hosted an afternoon tea party. Some cakes were classic recipes I followed almost to the letter, and suggest you do the same; with others, I got a bit more creative. When you're baking all day it's best not to strain the brain too hard.
Classic scones - I turned to the BBC's recipe here, for simplicity. Breads and I have never really clicked, so I wanted firm guidance from Auntie. Make scones on the day for freshness and warmth that will impress.
Palatial shortbread - Millionaire's shortbread is fast becoming a family favourite, and you can find versions of it in hip coffee chains all over the country nowadays. My version is slightly more decadent even than the Beeb's. Following their recipe mostly, I added 2 teaspoons of ground cardamom to the shortbread mix (a combo I picked up from here years ago).
I did accidentally turn my back on the caramel resulting in a delicious fudge. I left the butter out of the dark chocolate mixture, for depth of flavour, and instead of white chocolate decorated the tops when still tacky with silver balls.
Rhubarb tartlets - all my own work
You Will Need: fairycake tin with twelve holes, large bowl, scales, dinner knife, clingfilm, rolling pin, pastry cutter/glass, small pan, small bowl, cup, chopping board and sharp knife, wooden spoon, fork, teaspoon, baking tray
2oz cold butter
1oz ground almonds
1 tsp ground ginger
3oz plain flour
1-2 stems ripe red rhubarb
butter
2 eggs
double cream
caster sugar
jar of crystallised ginger
1) Make the pastry. Cut the butter into little cubes. Knead with the dry ingredients with your hands, first to breadcrumb stage and then squidging into a single ball. Wrap in clingfilm and chill in the fridge for half an hour.
2) When the pastry is cold, preheat the oven to 180 C. Roll the pastry out on a floury surface until 3-4mm thick. Be aware that this pastry is very 'short' or flaky. It will not like you! Do not despair. Cut circles out of the pastry and press them into the tin, squidging any cracks together with your fingers. You should be able to make at least 6. I got 7.
3) Poke two sets of holes into the bottom of each pastry case with your fork, to allow any air bubbles trapped underneath to escape and not bugger them up. Bake until golden brown, about 10 minutes.
4) Allow the cases to cool completely before touching them again. If tempted, make more cake while waiting.
5) When the cases are cool, trim the ends off your rhubarb and pull out any stringy ribs from the square edges. Chop it into 2-3cm pieces, and if they are fat, halve them lengthways. Put 2-3 pieces of rhubarb per pastry case into a small pan with a knob of butter and a splash of water. Fry/poach the rhubarb, adding a little more water as it evaporates, until the rhubarb is pink and tender and strings are coming off it.
6) Lift the pastry cases onto a sturdy baking tray and fill them with rhubarb.
7) Separate the eggs, with the yolks going into a small bowl and the whites a cup (save whites for meringue in the fridge). Add a small pile of sugar. Beat this together with a fork. Gently heat enough double cream to cover the bottom of your small pan. Add the eggmix and stir quickly to blend. When blended, take off the heat and carefully spoon into the pastries, around the rhubarb.
8) Put back in the oven (hey I didn't say to turn it off) for another 7 minutes, to bake the custard and roast the tips of the rhubarb. When out of the oven, drizzle some of the sugar syrup from a jar of crystallised ginger over the top of each one. This makes all the difference.
Mini battenberg
This is a lovely recipe from the Hariy Bikers. I only made one egg's worth of sponge, dividing my tin with their greaseproof paper trick into 3 - half for battenbergs, and one for my shortbread. I also added lemon zest and a splash of juice to the 'yellow' Berg, and used 3 tsp of raspberry jam to colour the pink Berg as I couldn't find the mother-out-law's cochineal.
Tuesday, 5 June 2012
Afternoon Tea Sandwiches
Afternoon tea is a Great British Institution. It is a Posh Thing. It is something 'the Set' might have done 'properly' in the 17 and 1800s. Messing it up is not done.
On the other hand, it is quite difficult to mess up afternoon tea. There are only a few boxes to tick, and there are multiple acceptable ways to experiment with the content, theme and context of the event (cupcakes! Steampunk! Picnics! Booze!) Here is what I reckon constitutes a 'proper' tea:
- Teas, plural, available - preferably some to be served with milk (e.g. Assam) and some without (Lady Grey).
- Scones, with real clotted cream, and at least two kinds of jam - a red/purple one and an orange one, minimum.
- Cake - either individual chunks, such as Lamingtons, brownies, or other traybakes; or a single large and creamy edifice.
- Finger Sandwiches.
- Sandwiches must be able to be eaten in two bites or less.
- They must have the crusts cut off, or it's not posh.
- The shape of the eventual sandwich (triangle or rectangle) is immaterial.
- Fillings may include spreads, but these must be savoury (not peanut butter).
- Faffless but uber-kitzch adornments such as cress should be rampant.
The Approved Sandwich-Making Method (appropriated from Douglas Adams)
The chief among knives, of course, was the carving knife. This was the knife that would not merely impose its will on the medium through which it moved, as did the bread knife. It must work with it, be guided by the grain of the meat, to achieve slices of the most exquisite consistency and translucency, that would slide away in filmy folds from the main hunk of meat. The Sandwich Maker would then flip each sheet with a smooth flick of the wrist onto the beautifuly proportioned lower bread slice, trim it with four deft strokes and then at last perform the magic that the children of the village so longed to gather round and watch with rapt attention and wonder. With just four more dexerous flips of the knife he would assemble the trimmings into a perfectly fitting jigsaw of pieces on top of the primary slice. For every sandwich the size and shape of the trimmings were different, but the Sandwich Maker would always effortlessly and without hesitation assemble them into a pattern which fitted perfectly. A second layer of meat and a second layer of trimmings, and the main act of creation would now be accomplished.
Suggested Flavours For Afternoon Tea Finger-Sandwiches
Meats
Roast beef / steak and mustard.
CurryNation Chicken: to make simple sauce, finely chop half an onion, fry in butter with 2tsp of cumin, coriander and a sprinkle of turmeric, and add coconut cream until spreadable. Coat diced fried chicken in the mixture and assemble the sandwiches as above.
Fish
Smoked salmon, cream cheese and dill
Mackerel and horseradish
Veggie
Cucumber. N.B. I could write a whole post on the Correct way to make cucumber sandwiches; the key thing is to peel the cucumber, slice thinly and drain the slices before assembly in a colander, scattered with salt. This stops them going soggy. Dress with salad dressing to increase flavour.
Cheese and chutney.
Saturday, 12 May 2012
Cross-stitch sampler update
This is a long-running project of mine, which is actually progressing faster in some ways than I thought it would. Having stopped at about here after running out of thread, and getting on with other projects like this, I've come back to my cross-stitch like an old friend for doing on lonely evenings in front of the telly.
The top two rows of leaves and deer are now finished, so I know exactly how wide my piece is going to be. Unfortunately, it looks like becoming just a little too wide - if I have to stitch right up to the edge of my cross-stitch material, I might have to put the edge of the fabric across the centre of my embroidery hoop, which makes for awkward loose stitches and fraying problems. Thankfully I have a little ordinary fabric put by with which to make a broad 'working border'.
This border probably won't make it to the final cut as it were; I intend to hem the work off, but either with more elegant fabric than this or invisibly. Then it can be hung on poles or framed as an attractive (hopefully) bit of Art. This is just to give me that little extra legroom as it were to work at the very edge of my cross-stitch fabric.
I know where the corners of my pattern will go; I also know where the centre should be now, at least vertically. This means that I can start placing the names of my relatives accurately in the border and really making this project into a proper family tree. I'm starting with my mother's parents, as I know Granny likes a bit of tapestry work herself and is very proud of her projects.
A Top Tip:
Cross-stitches can be done half at a time all in a long row, like this: ////////// and back again \\\\\\\\;
Or you can do them one at a time, like this: X X X X X to get the same result.
The difference between these two methods is that with the first, you end up in the pattern where you started, and with the second, you progress across the pattern stitch by stitch. The second also means that you may start each X in a different corner each time, as you cannot re-enter where you just finished.
If your pattern is complex, involving a lot of spaces and jumps across other colours, you may wish to combine these two techniques judiciously in order to 'jump' between adjacent 'blocks' of the same colour. I have found the brown border responds particularly well to the XXXX treatment when trying to count to the beginning of the next repeat.
Sunday, 6 May 2012
Raspberry Lamingtons
A posh twist on an old Aussie favourite, these were created for the father and stepmother to enjoy after a rich Sunday lunch. Little and light, they're a moreish teatime thing. There aren't many ingredients, but there are two stages of creation; if you're too bored to bother individually coating little cubes, then melt some jam over the whole cake when cool and scatter with coconut for a twinkly icing substitute.
Raspberry Lamingtons
2 eggs
4 1/2 oz butter
4 1/2 oz sugar
4 1/2 oz self-raising flour
150g fresh raspberries
half a jar of raspberry jam
75g dessicated coconut
1) Preheat the oven to 180 degrees C. Cream the butter and sugar in the large bowl; beat the eggs in the small bowl with the fork and incorporate very slowly.
2) Fold in the flour a little at a time. Line the tin with a wide strip of greaseproof paper, greasing the sides if not non-stick with a little butter. Pour the cakemix into the tin and spread to the edges.
3) Stud the cake with raspberries, 1/2 cm apart. Reserve any remaining fruits for making a 'serving suggestion' style flourish.
4) Bake for 15-20 minutes to clean skewer stage. Turn out onto a cooling rack. When cool, cut the cake into small cubular pieces.
5) Melt 1-2 teaspoons of jam at a time in the small saucepan until runny and steaming; pour into a small dish. Scatter coconut on a small plate. Dip each lamington in jam on all sides and then roll them in the coconut to cover. Pile on the serving plate. If your jam gets too jammy for dipping, pour it back into the pan to re-heat.
Serve scattered with any remaining raspberries and a big mug of tea each.
Wednesday, 18 April 2012
Knitting A Dress In The Round: FINISH HIM
The above title is an allusion to 90s beat-em-up button masher Mortal Kombat, in case you were wondering.
Once you have reached up to two-three inches of your desired final length, stop doing the lace repeats and work three rows of knit stitches, knitting over the purled decrease-triangles (they were only purled to keep them visually separate from the lace). On your fouth row, do a picot row: *knit1, yarnover, knit2tog*; then do another six rows of knit stitches, followed by another picot row; followed by another two rows of knit stitches. Now cast off.

Turn the work wrong-side out, and fold up the hem along the lowest row of picot holes. Slip-stitch the hem into place with the last of your wool. Weave in any dangly ends you can see using the TechKnitting tips to help you (they are AMAZINGly good).
Try on your dress right-side-out before blocking, to see which directions it needs to stretch and be moulded. Bear in mind that the lace will expand downwards a good way when blocked, outwards too.
Now hand-wash your dress in warm water with delicates-washing soap. Don't bash it about too much as we don't want to obscure all the holes in the lace by felting the wool (which makes it fluffy). When you're bored, pull the dress into a long thick rope top-to-bottom and squeeze the water out from the bodice to the hem. This helps to lengthen it and straighten the lace stitches. Lay a towel over a large chair or sofa, and using as many pins as it takes to hold it down, stretch and shape it so that the picot rows stand out at the upper edge and the increase section is nice and flared. Leave to dry naturally.
Meanwhile, choose your ribbon. I am lucky enough to live and work just round the corner from VVRouleaux, a boutique which specialises in designer trimmings, ribbon and frills. Strikingly-coloured ribbons can be a surprisingly cheap or expensive way to tart up a craft creation, depending on how difficult it is to make the ribbons in the first place. As my dress is an ivory white, I had to choose carefully to get the right level of subtle 'accent' colour. The light in my workroom is awful but the ribbon is grey/lavender.
When your dress is dry, attach a safety-pin to one end of your ribbon, and using the blunt 'head' end weave approx. 1 metre of ribbon through all of the picot holes at the top edge and under the bust. Start at the centre, work your way round and cut leaving plenty of length for loosening the tension and for a bow. Trim the ends with the traditional triangle to discourage fraying, or carefully roll the ends back on themselves and secure with a few tiny stitches.
Done!
Turn the work wrong-side out, and fold up the hem along the lowest row of picot holes. Slip-stitch the hem into place with the last of your wool. Weave in any dangly ends you can see using the TechKnitting tips to help you (they are AMAZINGly good).
Try on your dress right-side-out before blocking, to see which directions it needs to stretch and be moulded. Bear in mind that the lace will expand downwards a good way when blocked, outwards too.
| N.B. the increase/decrease diamond has flattened out |
Meanwhile, choose your ribbon. I am lucky enough to live and work just round the corner from VVRouleaux, a boutique which specialises in designer trimmings, ribbon and frills. Strikingly-coloured ribbons can be a surprisingly cheap or expensive way to tart up a craft creation, depending on how difficult it is to make the ribbons in the first place. As my dress is an ivory white, I had to choose carefully to get the right level of subtle 'accent' colour. The light in my workroom is awful but the ribbon is grey/lavender.
When your dress is dry, attach a safety-pin to one end of your ribbon, and using the blunt 'head' end weave approx. 1 metre of ribbon through all of the picot holes at the top edge and under the bust. Start at the centre, work your way round and cut leaving plenty of length for loosening the tension and for a bow. Trim the ends with the traditional triangle to discourage fraying, or carefully roll the ends back on themselves and secure with a few tiny stitches.
Done!
Sunday, 15 April 2012
Failsafe Chocolate Mousse Panacotta
| Originally presented with strawberries and cream... |
The literature also generally involves a lot of 'milk or tea first in cup'-type arguments about whether to have hot chocolate and cold cream, or hot both, or hot cream and cold chocolate. I went for the latter simply because my 'recipe' involves melting gelatine, and this seemed easier to do in cream than choccy.
People also talk a lot of guff about Valhrona and the importance of using 'really GOOD QUALITY' chocolate for any and all things. I may be very middle class, but Sainsbury's cooking, Dark, has always been good enough for me and mine.
For the moulds I cannot recommend silicone cupcake cases highly enough - they give such a lovely even shape. But you can always serve mousse in little pretty cups (or even ugly cups) if occasion calls.
Chocolate Mousse Panacotta
- to make well in advance of eating
You Will Need: sharp knife, chopping board, measuring jug, small saucepan, wooden spoon, 2 cups, small bowl, fork, whisk, large bowl, moulds/serving dishes. If using silicone moulds, plates. Serving platelets.
100g dark chocolate
150-160ml double cream, plus dribble to decorate
1 leaf leaf gelatine
2 eggs
fruit to serve
1) Break the chocolate and chop it into small slivery pieces. Put in the larger bowl. Soak the leaf of gelatine in a cup of cold water for about five minutes. Meanwhile,
2) heat the cream gently in the saucepan until hot-bath-hot to touch. Separate the eggs, with the whites going in the small bowl and the yolks into the second cup. Beat the yolks with the fork and mix them into the hot cream to make a quick custard. Fish the gelatine out of the water and add to the cream. Stir to dissolve.
3) Pour the hot cream over the chocolate, and stir until the chocolate is all melted. If choccy lumps give you trouble, rinse and refill your saucepan with water, plonk the bowl on top of the saucepan, and heat again, stirring continuously. This gentle method will stop the mixture from curdling.*
4) Whisk your eggwhites to a stiff-peak stage, and gently whisk them 1/3 at a time into the chocolate mixture.
5) Fill your bowls or moulds with mousse mix. If using floppy individual silicone moulds, you may find that sitting them on a plate stops them from wibbling EVERYWHERE as you move them to the fridge.
6) Allow to set in the fridge for at least 4 hours.
7) Cut your fruit decoratively; dismount your puds onto little plates, garnish with fruity pretentiousness and drizzle with cream á la Michelin. This pudding should have a Faff -to- Posh ratio of about 1:5.
*This is as close as I get to telling people what to do to their chocolate. Provided you heat it using the gentlest methods, especially when adding more fat (i.e. cream), it is much more forgiving than you might think.
ProTip: I did mention to my boyfriend (after he puzzled over the ingredients resulting in the stipple-effect look) that there was gelatine in these, and he made a face. 'I know it's fine, and you can't taste it, but...' Gelatine still means packets of cubular strawberry jelly to many people, and even though I was using leaf posh stuff (which is both a ProTip in itself and tasteless) negative associations are strong. So if you want to keep your choccy-beneficiaries out of the loop and act all mysterious, feel free not to share the recipe too widely.
Thursday, 12 April 2012
Moroccan Main Dishes
Here you can see the remains of the Easter Feast which i created on Saturday. Although it felt like a long day of cooking had happened, none of these things actually take very much work - just monitoring.
Slow-Cooked Spicy Lamb Shanks
You Will Need: Oven tray, tinfoil, sharp knife and chopping board
1 lamb shank per person (or to share between 2 unhungry people)
jar of anchovies
clove of garlic per lamb shank
spice mix - to include coriander, cumin, salt, black pepper, chopped garlic
1) Preheat the oven to 200 degrees C. Line the oven tray with tinfoil.
2) If you don't know the weight of your meat, weigh it. Stab the lamb shanks in their juiciest bits. Chop anchovies in half and garlic cloves into thin slices, and push an anchovy and sliver firmly into each stab with your fingers.
3) Arrange the shanks in the tin and sprinkle over the spice mix. I used a bought tin of generic Moroccan goodness I had from years ago, but you could make your own. Use enough to coat the shanks on both sides and rub well in.
4) Cover the shanks with another layer of tinfoil, and tuck in the edges. Wham in the oven, then turn it down to 150 degrees C. Bake for about 40 minutes per pound and then some if you can manage it.
Lamb Kofta Kebabs
You Will Need: wooden skewers, oven tray, large bowl, fork, chopping board, knife, cheesegrater.| Mint to the left already looking limp |
500g lamb mince
half a red onion
6 cloves garlic
1 tsp cumin
large bunch of fresh mint
1 egg
1) Soak the wooden skewers in water to stop them from catching fire under the grill.
2) Preheat the grill.
3) Grate as much as possible of the onion on the larger holes of the cheesegrater; chop the garlic and mint finely. Add to the mince in the large bowl. Break in the egg to one side and beat with the fork. Now use the fork to mush it all together until smooth.
4) Get your hands in and make comfortably sized phallic lumps of meat; slide a wet skewer into each one. Place on the oven tray as you go. If you have any left over, make the meat into patties to fry like burgers - they won't need any extra fat.
5) Grill until well browned, turning once during cooking to get both sides. These heat up well in the oven or back under the grill later if you should need to grill a big tray of something else:
You Will Need: Oven tray, chopping board, knife, small bowl, kettle
Large bell peppers, half per person or two for a veggie main
olive oil
couscous
sultanas or chopped apricots
flaked almonds or pistachios
cumin
salt
greek cheese e.g. feta
1) Preheat the grill.
2) Cut the peppers lengthwise, removing any seeds but keeping the stems on for decoration. Pour a little oil into each one, roll it around the inside to coat and rub on the outside as well. Grill on the oven tray until blackening, then turn over to do the other side.
3) Meanwhile, make your couscous as per packet instructions - about 2 dessertspoonfuls per pepper or less. Add a handful of fruit and nuts and a pinch of salt and cumin to make things interesting. Chop the cheese into small pieces.
4) Take the grilly peppers out, fill with couscous and top with cheese. Put back under the grill until the cheese is browning and squidgy.
Sunday, 8 April 2012
Moroccan Starters
| Top right: couscous with flaked almonds, black pepper and ground cumin |
This Easter I indulged my friends eating and my cooking by conceiving an enormous Moroccan feast. There were six of us to dinner, and there are still leftovers to feed 2 people, so do take my measurements with a pinch of salt and pay more attention to the proportions to get appropriate amounts of everything.
Tabbouleh
You Will Need: Large bowl, large saucepan, colander, chopping board, sharp knife, lemon squeezer
300g bulghur wheat or pearl barley
6 large fresh tomatoes
large red onion
large bunch of curly-leaved parsley
juice 3 lemons
2 tablespoons olive oil
1) Bring a pan of water to the boil. Simmer the grains for about 40 minutes, until nutty but definitely chewable. You may wish to do this in advance, drain and keep in the fridge until you are nearly ready to make the rest of dinner.
2) Finely chop the tomatoes, onion and parsley.
3) Juice the lemons. Mix all of the ingredients together in the large bowl.
Grilled Tomatoes
You Will Need: Roasting tin, knife, kitchen foil
1 packet cherry tomatoes on the vine
1/2 packet Feta or other hard Greek cheese
flaked almonds
olive oil
1) Preheat the grill.
2) Chop the feta into small pieces. Line the tin with tinfoil, arrange the ingredients and drizzle with oil.
3) Grill until the tomato stems are blackened and the skins are wrinkled off, about 7-10 minutes.
Grape and Pine-Nut Salad
You Will Need: large bowl, lemon squeezer, small frying pan
1 bag sweet fresh salad
1 packet white grapes
pine nuts
2 lemons
olive oil
1) Toast the pine nuts in the little frying pan: get the pan hot, pour in the nuts without any oil and shuffle them until browned and fragrant.
2) Squeeze the lemons.
3) In the large bowl, mix the salad, grapes and nuts; dress with lemon juice and olive oil.
Simnel Cake
| To the left, iced tea made with 3 bags Lady Grey, 4 sprigs mint and 1 lemon to 1 litre boiling water |
This large and imposing article formed the pudding for a Moroccan Easter dinner, which was to have involved roast figs. Unfortunately Waitrose (Christ's own supermarket) didn't have any fresh figs (Jesus does like them, but decrees that they should be unavailable). You could very much use dates and dried figs in this recipe if you like, but for lightness I prefer pears and apricots.
Simnel Cake
6 eggs (13oz)
13oz butter
6oz light brown soft sugar
3 oz caster sugar
1.5 tblsp clear runny honey
10oz dried fruit - dried pears, cranberries, apricots, vine fruits (use minimum amounts of raisins).
zest 1 lemon
zest 3 clementines
chopped flesh 1 clementine
2 Lady Grey teabags
300ml boiling water
13oz self-raising flour
1tsp ground cardamom (or 1/2 tsp nutmeg)
2tsp ground ginger
1/2 tsp ground cinnamon
packet marzipan - 200g ish
jam
11 chocolate Mini Eggs
You Will Need: 24cm cake tin, large bowl, small bowl, scales, kettle, measuirng jug, sieve, saucepan, chopping board and sharp knife, zester/cheese grater, wooden spoon, whisk, teaspoon, tablespoon, rolling pin, serving plate
1) Preheat the oven to 180 degrees C. Boil a kettle.
2) Put the two Lady Grey teabags in the measuring jug and make 300ml of tea with the boiling water. Leave to steep while you do Step3.
3) Chop any larger pieces of dried fruit into raisin-sized pieces. Put the dried fruits into the small bowl with the citrus zest. When it is ready, pour over the tea to cover and leave to soak.
4) Weigh 6 eggs (mine came to 13oz more or less; one normal egg is about 2oz). Weigh out the same amount of butter, and melt in the pan with the sugars and honey. Don't get too niggly about the amount of honey which sticks to the spoon, if you use the measuring spoon to stir the mix it will all come out in the wash.
5) While the butter and sugar is melting, quickly beat the eggs together in the large bowl. Go back and stir the butter/sugar until all the butter has melted and the mixture is caramel brown. Now very carefully pour the melted mix onto the eggs, whisking to mix as you go in a steady stream. This is by far a superior technique for speed than creaming things.
6) Strain the fruits out of the tea. Add the fruits to the eggmix; chop the clementine into raisin-sized pieces and stir in. Add 100ml of the tea. When mixed well, weigh out flour to match your eggs and butter. Stir in the spices. Fold the flour and spices into the fruitmix a quarter at a time, until smooth.
7) Put the finished cakemix aside. Divide your packet of marzipan into 4 equal pieces. Scatter caster sugar over your worksurface, and roll out circles the size of your caketin using 2 quarters. Pour 1/3 of your cakemix into the tin; cover with a marzipan circle; pour in another 1/3, another circle; finish with the last 1/3.
8) Bake for approximately 1 hour 30mins, or until a skewer in the very middle comes out clean. If it looks to be browning too much at the edges, put a piece of tinfoil over the tin to protect the top of the cake from burning.
9) Allow the cake to cool completely, and turn out onto its eventual serving plate. Spread the top with a fine layer of jam. Roll out one last circle of marzipan and cover the top of the cake with it, trimming any loose edges. Using the last quarter of the marzipan, make 11 balls to decorate the top. These represent the faithful Apostles e.g. everyone except Judas. I have made marziflower-nests for 11 mini eggs because I am a hopeless pagan.
Subscribe to:
Posts (Atom)
