Many people dislike traditional Christmas cake. It can be stodgy, contains sultanas (which I know at least one boy who hates) and involves marzipan and royal icing, each of which can be problematic in mixed company. However, Christmas in my father's house would not be Christmas without a cake, and if it is a winter-stodge-cup-of-tea-type cake (which it should be), that means dried fruit.
The following makes a nice tasty round for the main holiday season, and won't burden you until February. It's light enough to be a 'normal' cake, with enough fruit to satisfy the ardent traditionalists.
Lighter Christmas Cake with Apricot Frangipane
You Will Need: One 24cm cake tin, greaseproof paper and scissors; chopping board and knife; large bowl, wooden spoon; small bowl, cup, teaspoon; saucepan; medium bowl, measuring jug, sieve; food processor or blender, zester/grater, cooling rack, serving plate.
3oz dried apricots (and apricots to decorate)
2oz ground almonds
6oz light brown soft sugar
9oz butter
3oz honey
2oz sultanas
2oz dates (and dates to decorate)
100ml Stones Ginger Wine
4 large eggs
7 1/2 oz self raising flour
1tsp cinnamon
1/2 tsp nutmeg
1 or 2 oranges
1) Preheat the oven to 180degrees C. Grease and line the tin with a circle of well-buttered baking parchment.
2) Chop the dates into little pieces. Soak the sultanas and date pieces in the Stones Ginger Wine. At this stage, if your apricots are very dry, soak them in water separately.
3) Chop the apricots finely, and mash them in the food processor. Add 2oz of ground almonds, 2oz of brown sugar, and 2oz of butter. Mush until combined. Scoop into a small bowl, and add the yolk of one egg (save the white in a cup for another project). Mix well and put by.
4) Melt the remaining 4oz sugar and 7oz of butter with the honey in the saucepan.
5) Beat the eggs in the large bowl; add the melted sugary mix in a slow stream, stirring constantly.
6) Strain the ginger wine back into the measuring jug, and put the fruit in the cakemix. Save the wine, mix the fruit. Gradually add the flour to the cakemix, along with the spices, and the zest of one of your oranges.
7) Now the fiddly bit. Slice your orange into 1cm rounds, and turn these 'inside out', peeling off the rind, separating the segments along their sides and joining the ends of the chain to make a 'cog'. Set these cogs inside each other on the bottom of the tin. Fill the gaps between the teeth with slivers of date and apricot.
ProTip: Navel oranges will not be as good for this. Remember that the finished cake will show the underside of the 'cogs' as you see them, so lay dates skin-side down and segments big-side down. Peel off any excess pith or teeny segments from the middle. Baby cogs can be made with a few segments; more than one orange is listed in the ingredients so that you can use the best slices from two.
8) Gently spoon over half of the cakemix, followed by the frangipane, then finish with the last of the cakemix.
9) Bake for approximately 1 hour, until a skewer comes clean. If it starts to brown too much halfway through, give him a tinfoil hat. Leave to cool in the tin for a good while before turning out.
10) Finish the cake by drizzling with the reserved ginger wine.
Showing posts with label christmas. Show all posts
Showing posts with label christmas. Show all posts
Monday, 7 January 2013
Thursday, 20 December 2012
Chocolate truffles

Don't they look deliciously precious?
This Christmas, as I had a few people who I owed a present and like but don't know intimately well, I decided to make my own chocolate truffles. They're just personal enough, being home-made, not to offend if people get the same thing as each other in public; and just impersonal enough to work for almost anybody.
Having said that, I chose the flavours carefully so that there would be a variety in every little package, and people wouldn't feel unable to eat any of their packet.
The wrappings were made from some cellophane I stole from work, and tied with the ribbons on some ordinary gift tags. The truffles were shaped by pouring the liquid ganaches into silicone ice-cube trays. These are becoming more common, and do make the job infinitely easier, but if you don't have one, no worries. Allow the ganache to set in the fridge until firm, then scoop out teaspoonfuls and roll them into balls in your hands. This is messy but fun.
 |
| Truffles in the mould |
ProTip: Keep two saucepans out, one for heating cream, the other with hot water. If your hot cream isn't enough to melt the chocolate by iteslf, place the mixing bowl over the pan of hot water and stir the ganache rapidly until it begins to loosen and melt at the bottom. Take the pan off the heat and continue stirring vigorously until the ganache is smooth. DO NOT overheat, or the choc will split and become a bitter, oily mess.
Chocolate Truffles (makes 10-20)
You Will Need for every flavour: Moulding trays (ideally), chopping board and knife, several small bowls, many teaspoons, small saucepans, measuring jug (minimum mark 50ml), spatula or wooden spoon. To wrap: nice paper, ribbon or tags, scissors.
Cherry Brandy Truffles
100g dark chocolate
50ml double cream
25ml cherry brandy
glacé cherries, dark, halved
cocoa powder
1) Chop the chocolate as finely as you can - this will make mixing it easier. Place in a small bowl.
2) Heat the cream until not quite boiling; add the liqueur. Pour the hot liquid over the chocolate.
3) Stir the cream and chocolate together until completely melted and blended.
4) Chop the cherries until you have as many halves as you want truffles.
5) Half-fill your moulds*, add a cherry-half flat-side up, and top off with more chocolate.
6) Chill for at least half an hour in the freezer, 2 hours in the fridge. Scatter a little cocoa in another bowl. Turn the chocs out of the moulds into the bowl of cocoa, and shuffle about until lightly coated.
*this recipe is difficult without moulds, but you could give it a go - forming balls in your hands around half-cherries. They will end up bigger and rougher.

Twinkly White Vanilla Truffles
100g white chocolate
30ml double cream
1tsp vanilla essence
decorative sugar balls/sprinkles
1) Repeat steps 1-3 from the first recipe, substituting the tsp of vanilla for liqueur.
2) Freeze the ganache for half an hour, until just firm. Scoop into balls with teaspoons and mould in your hands. You washed your hands, right?
3) Scatter sugar balls into a bowl. Turn out truffles into the bowl and roll in the decoration.
N.B. White chocolate gets its distinctive colour from containing almost no cocoa solids. This means that it melts more easily and needs less cream to make a satisfying ganache.

Trebor Extra Strong Snowballs
You Will Need: Pestle and mortar
100g dark chocolate
50ml double cream
3-4 Trebor Extra Strong Mints
1) Make the ganache as for Cherry Truffles, witholding the liqueur.
2) Pour into moulds and freeze for half an hour to set.
3) Crush 3-4 mints to fine dust in a pestle and mortar; roll the truffles in the dust until coated.
Coffee Truffles
 You Will Need: sieve
 100g dark chocolate
70ml double cream
1 tablespoon fine ground coffee
1) Chop 100g of the chocolate finely. Put in a small bowl to mix.
2) Heat the cream with the coffee granules gently, stirring, for a while to allow the coffee to infuse.
3) When the cream is hot and coloured, pour it onto the chocolate through the sieve. You don't want grit in your chocs. Stir until the choc and cream are well blended. Not all of the cream will come through the sieve.
4) Pour the ganache into moulds and chill until firm, or chill and roll into balls.
To Present
A square of cellophane or paper 8ins on each side will just envelop eight truffles comfortably.
Wednesday, 12 December 2012
A Simple Christmas

It's really getting festive round here. At the house where I live, (where Christmas is very savoury-food-centric), the fridge is beginning to fill with ham, sausagemeat, red cabbage and turkey liver for paté. I'm sure that at my father's flat the big red wooden reindeer full of drawers is doing his Advent duty. Only yesterday I spent a very happy morning decorating the window of the shop where I work. The air is nippy; the frost is on the ground; Oxford Street is heaving.
It's really high time we all started getting sorted, so to help out, I'm posting a list of all the festive advice and recipes I've given on this blog in one place. You'll notice that there are some conspicuous absences from this list - nativity scenes, Christmas pudding, turkey or goose recipes, mince pies, and so on. At some point I will post my recipe mincemeat mince pies made with real minced meat - not mincemeat, minced meat - or meatmince, if you will. But I have to get them perfectly squidgy and flavoursome first. As for the rest - I can only blog so much a year!
Decorations:
Needle felted
Leather
Christmas (fruit) cakes:
Figgy Upside-Down
Marzipan Painted Fruitcake
Orange Upside-Down Layer Cake
European Christmas Biscuits:
Pepparkakor recipe
Gingerbread house template
Gingerbread stave church
Basler Brunsli
Traditions:
Die Hard and Biscuits
Advent
Flower arranging:
Christmas Greenery
Tuesday, 4 December 2012
Needle Felted Bunnies (Twee and Rock)


Thursday, 29 November 2012
Needle felting Christmas decorations
 |
| My fluffy little creations! Including Gay Pride Santa, who is fabulous. |
Hooray! It is the first Christmas post of this year, and I have discovered a new craft! And it's the Simplest yet!
NEEDLE FELTING.
 |
| Beginning the pomander, on sponge, with official needle |
All you need is some sponge, one or four of the official felting needles, and the right fluffy wool (available relatively expensively, compared to knitting wool) on the internet in various places and many many colours. (P.S. you can even use cat hair. Seriously, google it.)
THEN YOU STAB IT UNTIL IT LOOKS AWESOME.
Behold!
 |
| Adding more layers of colour is easy |
All of these lovely things are so easy to make it's not true - just wrap the wool into shape and stab it until it sticks. The more you stab, the denser the material becomes and the less pliable. You would not believe how small a tuft you need for making eyes or dots with - just a few hairs, seriously.
 |
| Base for Mary - body cylinder, white head and cloak |
 |
| Finished Mary, with arms, white 'hands' and yellow halo |

Friday, 5 October 2012
Fig Upside-Down Cake
I made this cake on the fly as a thank-you present for lots of people. It needed to be rich and square so that everyone could take a small piece which would satisfy them and not spoil the shape of the cake. I think it would make a lovely low-key Christmas cake for those who are not big on the traditional version.
Fig Upside-Down Cake
You Will Need: 20cm square cake tin, scissors and greaseproof paper, scales, large bowl, small bowl, teaspoon, kettle, chopping board and knife, sieve, wooden spoon, dinner knife, lemon zester or grater, rolling pin, cooling rack, serving dish.
4 ripe figs
40g hazelnuts
8oz soft butter
6 1/2 oz caster sugar
3tsp honey
12 fresh dates
2 large handfuls of sultanas
2 Lady Grey teabags
4 eggs
zest one orange
8oz self-raising flour
100g golden marzipan
1) Preheat the oven to 180 degrees C. Grease the bottom of your tin. Cut two long slices of greaseproof paper, and cross them in the bottom of the tin.
2) Cut the stalks off your figs. Slice them into 3mm slices. Use to line the bottom of your tin in a symmetrical pattern. Scatter hazelnuts into the gaps between the fig slices.
3) Chop the dates, removing the stones. Put them in a bowl with the sultanas and teabags; add just enough boiling water to cover them. Allow to steep.
4) Cream the butter, honey and sugar in the large bowl. Add one egg at a time, beating in well, followed by some of the flour, then the next egg. Beat to a smooth mixture. Zest the orange and stir in the zest.
5) Drain the fruits in the sieve and add the dry fruits to the mixture. Mix gently. Spoon half of this mixture into the tin, being careful not to spoil the fig pattern.
6) Roll out the block of marzipan into a square, about 2mm thick and smaller than your tin. Place on top of the mix in the tin, then pour the rest of the mix on top. Level the mixture.
7) Bake for about 40+ minutes, if necessary with a tinfoil hat on to prevent browning.
8) Cool for a long time in the tin before turning out, first to the cooling rack and then sliding onto the final plate.
Monday, 17 September 2012
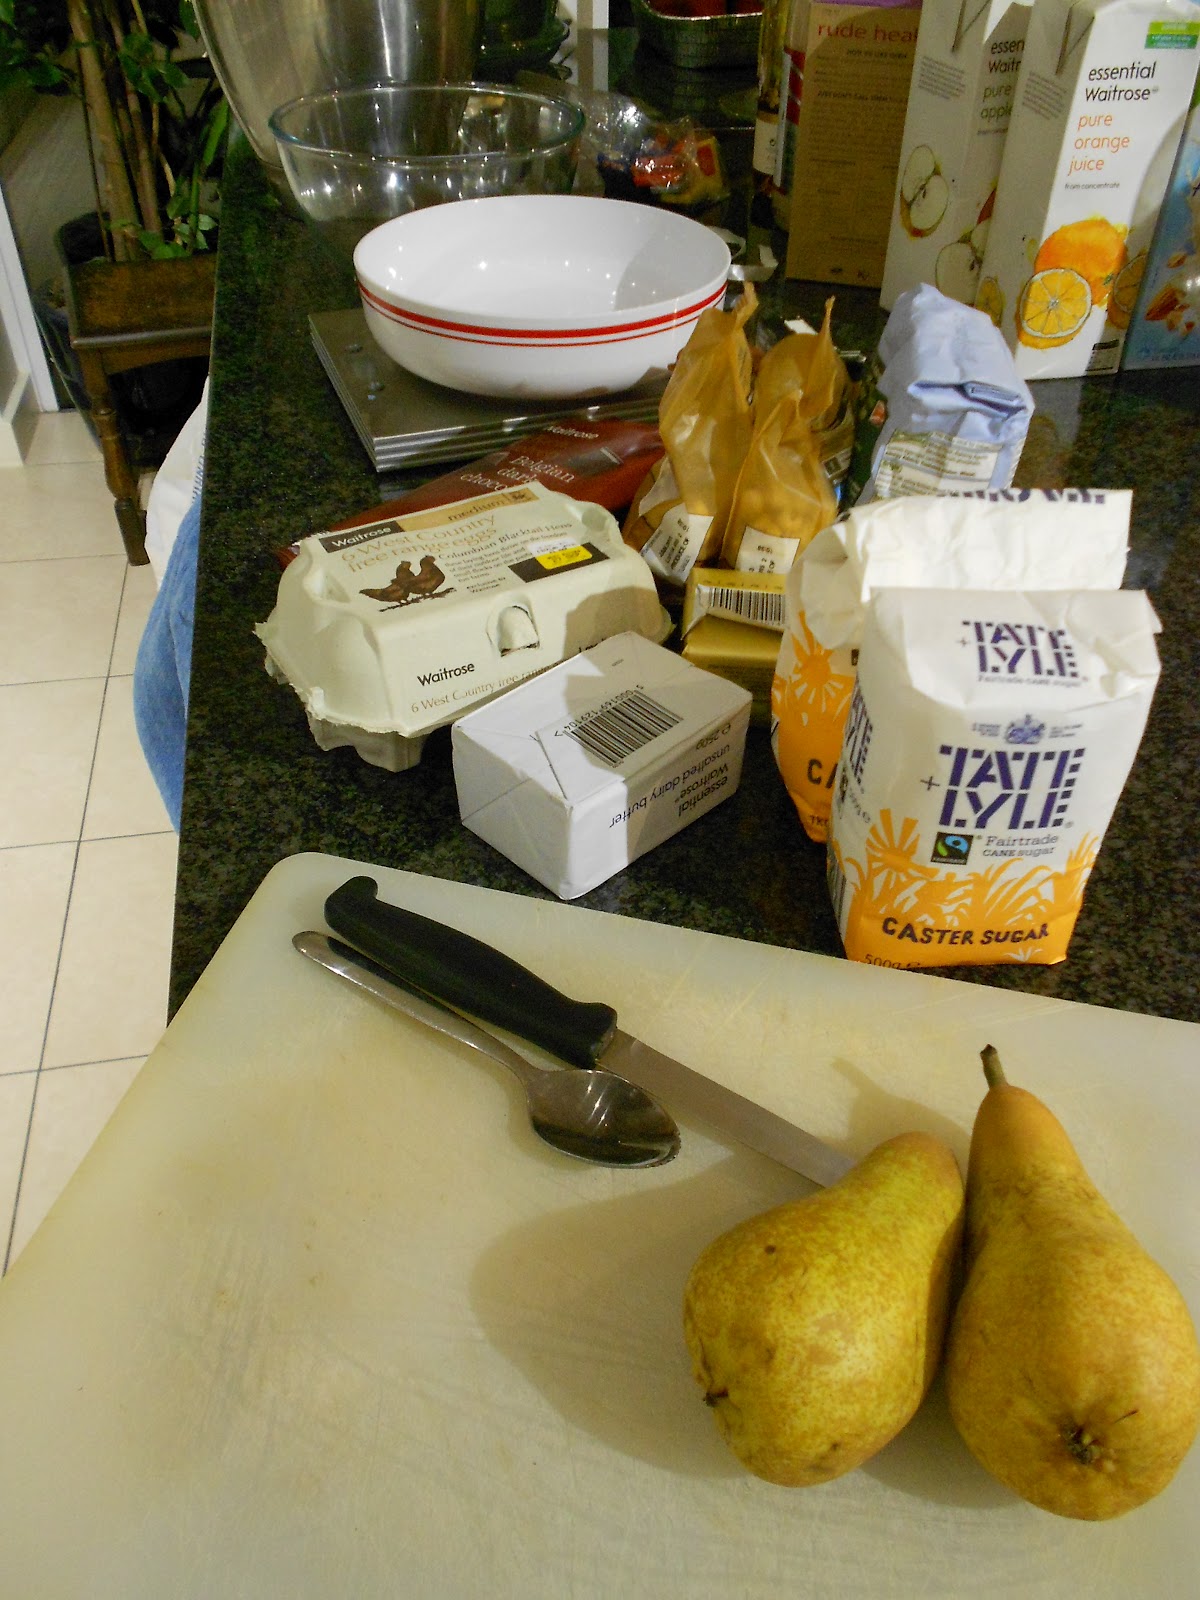
Decadent Pear and Chocolate Birthday Cake


A little while ago I mentioned this cake, and this one which I made in response. My good friend made a beautiful-looking pear and dark chocolate version, although much like me she struggled with unripe fruit and getting the curd to set. I was sorry I didn't get to taste it, as it has really inspired my second try.
This is an expensive confection as it involves buying hazelnuts (peeled nuts are a luxury in this country for shame) and a bottle of decent sweet wine. Thankfully fruit and chocolate are both cheap! It is also a multi-stage bastard. As I have said, usually I avoid multi-stage anything like the plague, being of the 'screw it we'll have stew' school of culinary excellence, but for one's birthday as a known baker one has to go the extra mile.
One benefit of these sorts of cakes is that almost any of the stages stands alone. The praline is a great peanut brittle substitute, the cake is obviously pleasant, the poached pears are a great pudding in and of themselves and the ganache could be used to make truffles. If you've been paying attention, you'll realise that I made all of these things one at a time over the past few days, to avoid a nine-hour baking binge on the night of the party.
 For shopping lists: Total chocolate used overall 500g, total cream used overall 300ml, total hazelnuts 400g
Spiced Pear and Chocolate Cake with Indulgent Pears and Hazelnut Praline
Hazelnut Praline, one batch - three decorative pieces, the rest powdered
Chocolate Ganache, one batch
Pears Poached in Sweet Wine, - 4 pears' worth including three pear fans to decorate
100g hazelnuts, to decorate
Spiced Pear And Chocolate Cakes
You Will Need: scales, 2 tins, greaseproof paper, wooden spoon, large bowl, chopping board and knife, (small grater),potato peeler, teaspoon, whisk, 2 medium bowls, cup, small saucepan, cooling rack
 100g chocolate
200g butter
200g sugar
5 eggs
2 small pears
1/2tsp nutmeg, or 1/2 a nutmeg grated
1/2tsp cinnamon
100g hazelnuts
200g self-raising flour
1) Preheat the oven to 180degC. Line and grease your tins.

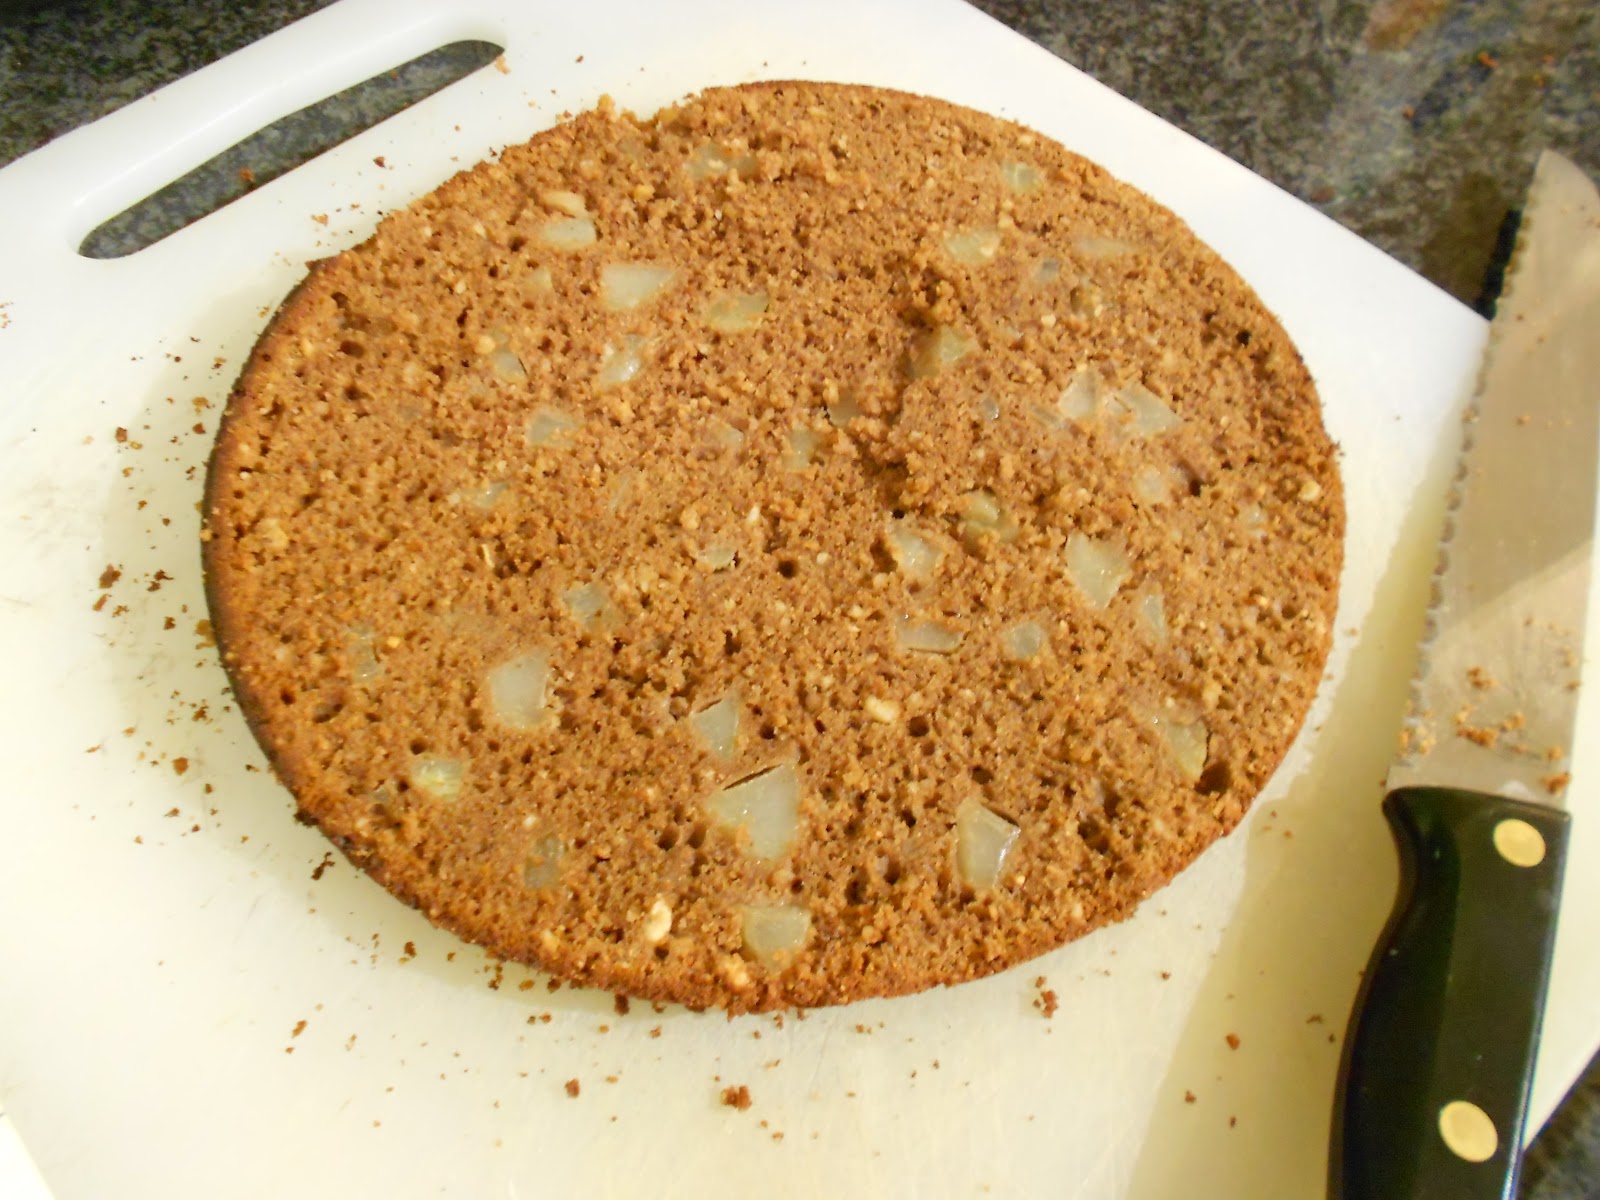 3) Separate your eggs, with the whites going into one medium bowl and the yolks a cup. Cut the butter into small pieces, and break up the chocolate. Set the second medium bowl over a pan of boiling water, and melt the chocolate, sugar and butter together. When the mixture is all mixed with no lumps, transfer to the large bowl and whisk in the egg yolks gradually.
4) Grind the hazelnuts, and mix with the flour and spices on the scales. Wash the whisk; whisk the egg whites to soft-peak stage; fold spoonfuls into the mixture alternately with flour, whisking the whites back up to peaks again between spoonfuls.
5) Pour equally into the tins and bake 30-35 minutes, until risen and clean-skewer.
6) Allow the cakes to cool in the tins for 10 minutes. Remove from the tins and allow to cool on a rack.

You Will Need: Serving dish, breadboard, breadknife, spoon, medium bowl, small bowl, small saucepan, teaspoons, dinner knife
200ml thick cream
200g dark chocolate
1) Allow your ganache to come back to room temperature so that you can work with it.

3) Spread a thick ring of ganache all the way around the edge of the cake on the serving dish, using your teaspoons and dinnerknife to manipulate it.
 4) Mix the hazelnut praline powder powder gently with the thick cream only until mixed. Spoon a round of this mixture inside the ganache ring. Top with the next round of cake.
5) Turn out the second cake onto the breadboard and cut it in two.
5) For the central filling layer, arrange the poached pear slices in an overlapping layer. Top with a third round of cake.
6) Use the remaining ganache and hazelnut cream to fill the third round, as before. Top with the final cake.

 7) Melt the last chocolate in the small bowl over the small pan. Pour this melted chocolate all over the cake, first spreading a layer to catch all the crumbs, then allowing it to dribble over the sides organically. Allow to cool slightly. Fan out the poached pear halves in a trio; wedge the chunks of praline in between the pears. Place hazelnuts evenly around the edge to mark portion sizes.
Fin! Serve to no fewer than a dozen people at once!

Wednesday, 4 January 2012
Knitting Reblog: Lace Bolero by Kelly Maher
 For Christmas, among other things, I was sent a hank of wool from Routt County, Colorado by my mother. It was so colourful, and so local to her area, that I wanted to make something entirely from it in one go to show it off, rather than do many mittens with it as she had intended. A quick search on Ravelry turned up this pattern for a bolero or shrug - bolero is to cardigan as fingerless gloves are to normal gloves I reckon.
http://kellymaher.wordpress.com/2007/07/04/ribbed-lace-bolero/
The lace pattern is particularly easy and beautiful, and I hope to learn more about how lace works as I do more projects. Yarnovers, which create a single loop of wool and leave a hole in the finished article, puzzled me at first but my grandmother was able to show me what the 'back' of a stitch was. Another useful skill gained from this pattern was the maths for working out inches-to-stitches - this was the first thing I've knitted where I bothered to do a 'swatch' first to work out my gague, but it was worth doing as my yarn was significantly thinner than recommended. I think I could still probably have made it smaller, as is usual with my clothes, but we live and learn.
Skills I couldn't pick up included the mini-cable row to transition between the lace and second set of ribbing rows, so I just missed that out. I also didn't switch back to smaller needles for the second rib set because I'd left them at my dad's place, but it doesn't seem to have made too much difference.
It's nice not to have a huge amount of wool left over from this project; with stuff so cheap at Kemps Wool Shop I always over-buy and end up with masses and masses hanging about. No worries - one of these days I will be arsed to make a jumper out of my leftovers, and then I will probably not have enough.
N.B. Photography for this post, and hopefully all future posts, was taken by the boyfriend for me with my own cheapo point-and-click digital Nikon, so I can stop stealing things from google image results and abusing the photography skills and generosity of my stepmother now. Look out for much more photo-ridden and hopefully more helpful posts in future, and I'll probably go back and update a couple of things from the archives as well!
Friday, 23 December 2011
Sharing Christmas Traditions
It is Christmas Eve. I am about 2 or 3. A family friend leans down and asks me, "What day is it tomorrow, Elisabeth?" in an encouraging tone. I think for a moment, and solemnly answer,
"Tuesday."
I'm going home for Christmas this year. It's not far, but it feels like a world away from the subtly different family traditions which I have been invited to at the boyfriend's for several years running. For me, Christmas is not Christmas without:
- Films - all seen a million times before - Die Hard, Muppet Christmas Carol, Wallace and Gromit and/or the Great Escape
- A tree of sorts, and decorations around the house
- A cake of sorts which must be more durable (yet considerably more edible) than a cockroach
- Stockings, real big wooly ones, at the end of the bed in the morning, to be opened before everything else on parent's bed. Must contain socks, posh colouring pencils and paper, and a Terry's chocolate orange at the bottom. Optional small Lego figures and sugar mice. I am now too old for stockings at my dad's, but still get given a very different and equally generous kind by boyfriend's mother.
- The Food: Goose for tea, Eggs Benedict for lunch, chocolate croissants for breakfast with lashings of Bucks Fizz
- The Events: a photograph of my Dad's foot, a tradition which started accidentally after he took photos of my toddling brother and I opening presents on the floor two years running and put his foot in it. The foot is now the star of the show.
- The Schedule: Presents happen after breakfast. Everyone knows this. Then you have the rest of the day to play with them. Everyone takes turns to open one present each, and watch the delighted (or not so) face of the recipient. I cannot understand the idea of presents after lunch, unless you have a second go when friends arrive for tea with more presents.
- The Delayed Reaction: Almost every year my un-godmother remembers to get or make my brother and I presents, and forgets to send them. There is then a brief revival of the Christmas spirit in February, about the same time as the last of the cake is binned.
Of course I won't be getting all of these things when I get home this weekend, because as I mentioned last year, there is a new family set up and new traditions are forming. I have grown older, and there are fewer presents and more bottles on the table. But there will be the memories, the ghosts of Christmasses past, in the air, in the conversation, and on the screens. There will be people to regale with stories such as the anecdote at the head of this post. I encourage all my readers to share their own traditional, ideal Christmas in the comments - and if you can, with your significant other.
Sunday, 18 December 2011
Orange Festive Layer Cake
The whole point of watching cookery shows is not (in my humble opinion) to try and learn or steal the recipes there shown but to work out which general flavours and techniques the chefs are using and steal them. One such I learnt was marmalade and game - another was a reminder to break out the orange zest. This is my Jamie tribute, and a change from both a traditional Christmas fruitcake and my usual Nigella Lawson Certosino with candied fruit on top.
Orange Festive Layer Cake
You Will Need: shallow rectangular tin, greaseproof paper and scissors; little plate, cheese-grater, lemon squeezer; small saucepan, scales, chopping board and sharp knife, large bowl and wooden spoon, whisk, plate, teaspoon, large plate.
4oz caster sugar
4oz Kerry Gold butter (I should get a sponsorship deal from them one of these days)
3 star anise
1/2 tsp ginger
8 cloves
2/3 oranges
2 eggs
4oz self-raising flour
1) Preheat the oven to 180degrees C. Line the bottom of your tin with a sheaf of greaseproof paper.
2) Zest the oranges onto a little plate. Juice one of the oranges. Add the juice to the sugar in the saucepan over a low heat and stir until dissolved. Simmer very slowly. Add the anise, cloves and ginger to the sugar.
3) Beat the eggs in the large bowl until well blended.
4) After a few minutes, fish the whole star anise and cloves if you can find them out of the sugar. Peel the oranges or three or four clementines and and slice them into half-centimetre rounds. Gently add these to the pan, coat in sugar and use to line the bottom of the tin.
5) Cut the butter into small chunks and melt into the sugar. Stir until blended on a low heat, then gradually whisk into the eggs in the large bowl.
6) Add the orange zest to the eggs. Stir to mix. Add the flour a little at a time. Gently pour the cake mix over the oranges in the tin and spread out evenly.
7) Bake for 15-20 mins or to clean skewer stage.
8) Allow to cool completely before turning out onto a plate, so that the bottom orange layer is now uppermost. To do this, put the plate over the top of the tin upside-down, grasp the bottom of the tin firmly and turn over. Remove the tin and papers.
9) Serve cold or warmed, with a glass of Grand Marnier and something creamy.
Pro Tip: If you doubled or even tripled the quantities, you could layer these one on top of the other to make an even fancier concoction.
Tuesday, 13 December 2011
Knitting Reblog: Hurricane Hat by Andrea Goutier
It's great to be knitting again after a while, and now that I've booked the flights to go and see my mother in the Colorado Rockies it seemed only fitting to start myself a skiing hat. A quick search on Ravelry turned up this lovely pattern by Andrea Goutier
: http://stringinmotion.blogspot.com/2008/04/hurricane-hat-copyright-sunshineknits.html

I have to admit that mine has not got the lovely swirls on it much at all - I was convinced I had misaligned my purl stitches for the first two inches, and then decided to abandon the decoration and do all knit stitches for speed as I needed my earwarmth quickly! But looking at it now, the swirls are putatively visible and I'm sure you can make them work.
I am in awe of this lady for being able to think up a pattern in the round. One day I hope to be a much better designer than I am, but in the meantime borrowing the genius of others to create necessary warmth will do.
I've also been following the blog Dances With Wool on Blogger, which is a beautifully written diary from a lady in Finland. Her Advent posts, counting down the few hours of daylight in the harsh Arctic December, are particularly touching.
Sunday, 11 December 2011
Gingerbread Stave Church


Gingerbread (well, Pepparkakor) Stave Church
You Will Need:
Remaining pepparkakor dough; ruler, pencil, squared paper, scissors; greaseproof paper, baking trays, rolling pin; royal icing; dinner knife; small bowl, small amount of dark chocolate; 2-3 packets dark chocolate Cadbury's biscuit fingers; cake decorations of choice.
1) Using your house pattern as a template, draw out another wall/roof layer, a tower and a pointed steeple onto squared paper, each about 3cm high. The second layer should start about 4cm from the eaves of the first.
2) Retrieve your remaining dough, and roll it out to 3mm thick. Cut out two of each wall, gable and roof, and four triangular steeple-pieces. With the remaining scraps, make dragons, crosses and a weathercock to stick to the roof.
3) Make a batch of royal icing using 1 egg white and 8oz of icing sugar, and/or use any remaining from making the gingerbread house.
4) Stick the gable pieces to the roof of the house. Add Wall 2 between the gables on each side, using skewers to prop up the bottom edge. Allow to set for a good while before attempting Roof 2. Glue everything together well with icing. Allow to set.
5) Add the tower pieces to Roof 2. Complete with the steeple pieces.
6) While the steeple is setting, melt a little chocolate in a small bowl in the microwave on a low setting. Use the chocolate to stick chocolate fingers to the large gable ends and walls of the church. Leave some space on one end for a door.
7) Spread more icing on the roof, and use to stick Shreddies, flaked almonds, jelly diamonds or other small tile-like sweetnesses on. I only did a row per roof as I ran out of icing, but may do more later. This is a good point to involve any small children you may have hanging about.
8) When you have finished decorating the walls and roof, add the dragons to each corner, crosses to each end, and weathercock on top of the steeple: Break the pointy end off a skewer to roughly the height of the triangular steeple, plus 2cm. Insert the pointy end into the edge of the weathercock carefully, supporting with icing if necessary. Post the blunt end through the top of the steeple, to rest on the top edge of Roof 2 inside the tower.

9) Place the church in its final resting-place, and sift icing-sugar snow over the top if desired. I did this to mine at the last minute before Christmas to prevent icing sugar getting everywhere in the meantime.

Saturday, 10 December 2011
Gingerbread House
Last year I tried to make a gingerbread house, and it didn't work *super* well because it was too house-shaped. Most templates on the interwebs have very steep roofs and short walls, as this makes balancing easier. When I drew my template for this year, I made it steepy too.

Yaay shoddy MS Paint diagrams are back!
The numbers are measurements in centimetres. Cut the shapes out of squared paper to make them easy to measure.
Gingerbread House
You Will Need: (Squared) paper, pencil and rubber, ruler, scissors; one batch of dough to make pepparkakor; greaseproof paper, baking trays, rolling pin, cooling rack; teatray, tinfoil; scales, small bowl, whisk, dinner knife, piping bag (or a freezer bag with one corner cut off to make a tiny hole), wooden skewers; cake decorations of choice.
1) Using my recipe from last year, make the pepparkakor dough. While it is resting in the fridge for at least half an hour, draw out the templates. The squared paper will make it much easier to get straight edges. Cut out one of each shape.
2) Preheat the oven to 175 degrees C. On a floured surface, roll out half the dough until it is about 3mm thick. Cutting around the templates, make two of each shape. Save all the remaining dough clingfilmed in the fridge.
3) Cover the baking trays in greaseproof paper and lay the shapes out on the trays with plenty of room to spare. If necessary do them in two or three batches.
4) Bake for 10-15 minutes until really golden and getting dark around the edges. This ensures stiffness.
5) When they are ready, take the shapes from the oven and allow to cool for a good while on the trays, before transferring to cool completely on the rack. Go and do something productive for half an hour to make sure they are completely cool.
6) Select where you want to put your house, and make sure that the teatray can sit there without any danger of being bumped into. Cover the teatray in a single layer of tinfoil, sellotaping the foil to the back of the tray at the edges.
7) Make the royal icing to stick the house together: whisk an eggwhite in a small bowl until frothy. Incorporate eight ounces of icing sugar a little at a time until really thick and glossy.
8) Assemble the house, using the piping bag or erzatz piping bag to draw straight 'foundations' of icing on the tinfoil for the walls and gables. Using volunteers, wooden skewers broken to size or a combination of both, hold up the walls and roof until you are sure you can leave the house alone. This should be at least 3 hours to be on the safe side.
9) Using more icing, stick cake decorations, sweets and so forth to the roof and gable ends of the house. If you wish it is safe to involve small children at this point. If you have a really steady hand you may be able to pipe icing icicles down from the roof.
10) Place the house in its eventual home, and scatter icing sugar over for snow if desired.
You may notice that you have some dough left over. Well noticed! Save all the bits, because if you feel in the need for something a bit more ambitious, skip stages 9 and 10 and come with me to the next post for a Gingerbread Stave Church...you'll need all your remaining dough. If you don't want to do that, you could make more happy shapes to surround your house with or to hang on the tree threaded with ribbon.
Sunday, 4 December 2011
Christmas decorations

Back home Dad and N had got a very small and stylish wooden christmas tree decoration, which was too little to hold even the littlest of our baubles really. Inspired, I fetched some thread, my riveting tool/holepunch (from John Lewis of course) sewing scissors and the leathers. It was a simple matter to draw rough designs on the leather in hard pencil, cut them out and punch holes in them with my marvellous tool.
A little thread or fine wire and they were ready to hang up. For the angel on the top I devised a different method - as he was flat, I gave him a square base with a square hole in it which folds back. This allows him to slot down onto the tree and then rest against it. He does look more like Mephistopheles than Gabriel, but I blame this on the inherent evil of commercialising the birth of Christ and celebrating it with bits of peeled cow.
Subscribe to:
Posts (Atom)