Pages

Showing posts with label Photos. Show all posts

Thursday, 21 March 2013

Goodbye for Easter


After a good few years of doing this blog, and posting sometimes sporadically and on many different things, I have decided to retire Simple Things To Make And Do.  This will probably be my last post.

The original idea behind this blog was to document a number of simple activities, and demystify a lot of crafts which people assume are difficult to learn and to master.  I hope I've done that.

Sadly, due to my inbuilt ambitiousness and impatience, I have tended to make things which are as far up against the limit of my abilities as possible - and I haven't always thought to pause while making them and document their development.  For example, I'm sure any of you could make the above Easter bunny, which is based on one I saw being made on YouTube back when I first discovered needle felting.  But I haven't got the photos to show you the order of the pieces, because I made him on a whim in one evening and only later thought 'damn, I should have blogged him.'

I'm glad to see that some of my posts are presumably being useful to people - my most popular posts are on the Grandmother's Flower Garden patchwork pattern and the Gingerbread House template.  I've also got a good few hits now on the League of Legends cake, which I hope is being imitated by baking gamers across the English-speaking world. 

On the other hand, the latter item is a perfect example of this blog going astray from its original purpose - although I felt that the construction of the LoL cake was simple, it took a long time, needed careful meringue piping (which again, I forgot to document), and was generally intended as something to show off to my boyfriend's mates.  I have felt myself straining not to show off in some of these posts, to maintain the 'you can too if you go on YouTube and get tips from these websites and have a little patience and only don't do this one thing...'

There is nothing wrong with 'look what I made' tumblrs.  They can be very inspirational.  But I don't think  my ego needs to do any more of that.  And I can't, now, find the time I once had as a student and then unemployed person to post very regularly about the little, genuinely Simple things - mostly cooking things - which I actually do every day and might be useful.

So, goodbye, loyal Simple followers - I doubt I'll stop blogging entirely myself, but I think I'll be finding a new topic next year.  If you've just joined us, please check out the archive for cool things you can Make and Do yourself, the sidebar for useful (mostly UK-based) craft supply shops and resources, and keep being ambitious in your crafting and cooking!  


Sunday, 3 March 2013

Needle Felted Dinosaur - Hadrosaur


Make your own duck-billed dinosaur! like this cheeky chappie based on the Parasaurolophus which my brother and I loved to make in our Jurassic Park PC game.
You Will Need:
felting needles and mat;
cuddly toy stuffing, thread;
Wool:
base colour
tummy and legs colour
two detail colours
black darning wool and wool needle, beads for eyes


Using a large puff of cuddly-toy stuffing, make a base.  Wrap white cotton thread around the fluff until it holds its shape.


Cover the base in a fine layer of base colour; add a long fat piece on one end for a tail


Make a wiggly neck and head and attach to the body


Tidy up underneath the neck so that there is no join visible between body and head, by over-felting a thin layer of base colour 


Roll leg colour into four cylinders - two big ones for back legs, two small ones for front legs.  Felt them onto the body.


Add a big waft of leg-colour to his tummy.


Make a head-crest out of a very thin cylinder of detail colour; felt the other, fluffy end down over the top of his face.


 Add more detail colour across the joins of his legs, to hide the join and strengthen it.  Make narrow stripes of accent colour to disguise this purpose.


Passing the thread through his head three times to secure the end, add a bead on each side of the head, slitted nostrils, and the mouth.  To make the mouth, pass the needle through to where you want to start, loop the mouth around the front of his head, and finish the stitch at the end of his mouth.  Now make two more stitches from the left and right ends to the centre of this large stitch to fix it in place.

Sunday, 24 February 2013

Needle-Felting Disaster Rescue


Even the craftiest amongst us - perhaps especially the craftiest amongst us - make mistakes, have disasters.  I am no exception.  This little guy was a perfect, fat, fluffy, cuddly-looking polar bear until I washed him with soap and water - something which I have been told to do to my creations by the Internet.

Polar bear collapsed.  His legs no longer held his own weight properly; the joins at his hips and shoulders looked narrow and frail; he was a mess.  I had no idea what to do with him.

Then more wool arrived from the fluff emporium I order from in Yorkshire, and it was many colours!  I was inspired to make my feeble flat polar bear into a base for a happy Stegosaurus.

Happy Steggy even inspired my Man, who is usually unimpressed by my crafting, to remark 'it's like he [polar bear] is wearing a costume,' and giggle a bit.  I did leave his little legs sticking out the bottom, as it seemed too much faff to coat them in a dinosaury colour, and why shouldn't stegosauruses have white legs anyway?

Speaking of legs, as he was a dinosaur and I wanted to decorate him a bit to make him scaly, I made the effort to add some beads to his hip and shoulder-joints.


Monday, 21 January 2013

Needle-felted Koala


Having made the needle felted wombat, I got stuck on Australian fauna for a while and created this cuddly character.  An easy two-colour model, he's lovely as a stress ball or just a furry friend.

You Will Need: grey felting wool, large hunk; white felting wool, smaller hunk.  Sorry I can't be more specific on gram weights, but my hand in the photo should give a good sense of scale.  One felting mat and felting needle; black embroidery or darning thread, large-eyed needle.
If like me you're working on your lap, a bit of rough fabric is a useful way to keep your clothes clean of fluff.


First make an ovoid body, not too highly felted just yet.


Second, create the head - roll half as much wool into another ovoid, and pinch the ends into the realistic koala shape seen here - with two lobed ears.  Heavily felt in between the ears to define their shape. 


Felt a fine wisp over the body and head, joining them together firmly at the neck join.


Add his white tummy :)


Roll a long wisp together to make a leg.  After an initial felting, rub legs and arms between your hands to round them out, before felting some more.


Heavily felt at one end to make feet.


Attach the legs pointing straight up...


...adding the knees when they're attached to the body.  Just fold the leg over and stick the pin straight through his kneecap.


Front legs are very similar...


...but for the added white wool on the inside.  Join them on sticking straight out ready for a hug :)


Add two tiny tufts of white wool, folded in half and felted on the fold, to his ears.
Embroider the nose in long stitches from top to bottom, pulled very lightly taut.  Add two French Knot stitches on top of each other for each eye (for this stitch, see these instructions.) Pass the thread through the back of his head and snip off to finish.  Voila!

If you like you can now give him a little bath, warm water and lots of soap rinsed and squeezed out of him with a towel, and then a little final felting of any rough edges.

Saturday, 12 January 2013

Needle-felted Wombat


For my first more ambitious project making a 'real' animal, which was supposed to look like it did in real life, I chose a wombat.  They're called 'furry bricks' in their native Oz, because they are both solid and rectangular - a perfect Simple shape for an animal to be.  They're also endearing to my stepmother, so I knew the finished article would have a good home when he was done.

I purchased the wool from a company in Yorkshire called Wingham Wool (http://www.winghamwoolwork.co.uk/).  It smells of sheep - lanolin.  Mmmmm.  Wombat still smells of sheep.

You Will Need: Large wisps dark brown wool, two black beads for eyes, sewing needle and black cotton thread, felting needle and block.

Step 1: select your wool.

Step 2: roll and felt it into an oval shape.


Step 3: add a ball at one end for the head.  To get the stripes on the body going the right way, add a wisp from head-end to tail-end.

Step 4: Heavily felt the join between the body and the head on one side, to make a neck sloping down.


Step 5: make the feet/legs (wombats are so stumpy!) Felt the middle of a large wisp to the body, and roll the ends up into feet.


Step 6: Felt the feet until sturdy rather than wispy.  Use the edge of the block to get purchase.


Step 7: Turning to the head, add two tiny wisps for ears - make a rough folded-over triangle on the block, then shape further as you add them to the head.


 Step 8: Make 'eye sockets' by heavily felting and pinching the sides of the head to give the illusion of bone structure under the fluff.


Step 9: Wet your wombat in warm water and smoosh soap all over him to a) alleviate the sheepy smell and b) set the felting.  Rinse out the soap and squeeze out most of the water, being careful not to get him misshapen when you're done.

Step 10: Sew on little black beads for eyes and make a little down-arrow of nostrils in an oval of backstitch for his nose.


Thursday, 20 December 2012

Chocolate truffles


Don't they look deliciously precious?

This Christmas, as I had a few people who I owed a present and like but don't know intimately well, I decided to make my own chocolate truffles.  They're just personal enough, being home-made, not to offend if people get the same thing as each other in public; and just impersonal enough to work for almost anybody. 

Having said that, I chose the flavours carefully so that there would be a variety in every little package, and people wouldn't feel unable to eat any of their packet.

The wrappings were made from some cellophane I stole from work, and tied with the ribbons on some ordinary gift tags.  The truffles were shaped by pouring the liquid ganaches into silicone ice-cube trays.  These are becoming more common, and do make the job infinitely easier, but if you don't have one, no worries.  Allow the ganache to set in the fridge until firm, then scoop out teaspoonfuls and roll them into balls in your hands.  This is messy but fun.

Truffles in the mould


ProTip: Keep two saucepans out, one for heating cream, the other with hot water.  If your hot cream isn't enough to melt the chocolate by iteslf, place the mixing bowl over the pan of hot water and stir the ganache rapidly until it begins to loosen and melt at the bottom.  Take the pan off the heat and continue stirring vigorously until the ganache is smooth.  DO NOT overheat, or the choc will split and become a bitter, oily mess.

Chocolate Truffles (makes 10-20)
You Will Need for every flavour: Moulding trays (ideally), chopping board and knife, several small bowls, many teaspoons, small saucepans, measuring jug (minimum mark 50ml), spatula or wooden spoon.  To wrap: nice paper, ribbon or tags, scissors.

Cherry Brandy Truffles
100g dark chocolate
50ml double cream
25ml cherry brandy
glacé cherries, dark, halved
cocoa powder

1) Chop the chocolate as finely as you can - this will make mixing it easier.  Place in a small bowl.
2) Heat the cream until not quite boiling; add the liqueur.  Pour the hot liquid over the chocolate.
3) Stir the cream and chocolate together until completely melted and blended.
4) Chop the cherries until you have as many halves as you want truffles.
5) Half-fill your moulds*, add a cherry-half flat-side up, and top off with more chocolate.
6) Chill for at least half an hour in the freezer, 2 hours in the fridge.  Scatter a little cocoa in another bowl.  Turn the chocs out of the moulds into the bowl of cocoa, and shuffle about until lightly coated.

*this recipe is difficult without moulds, but you could give it a go - forming balls in your hands around half-cherries.  They will end up bigger and rougher.

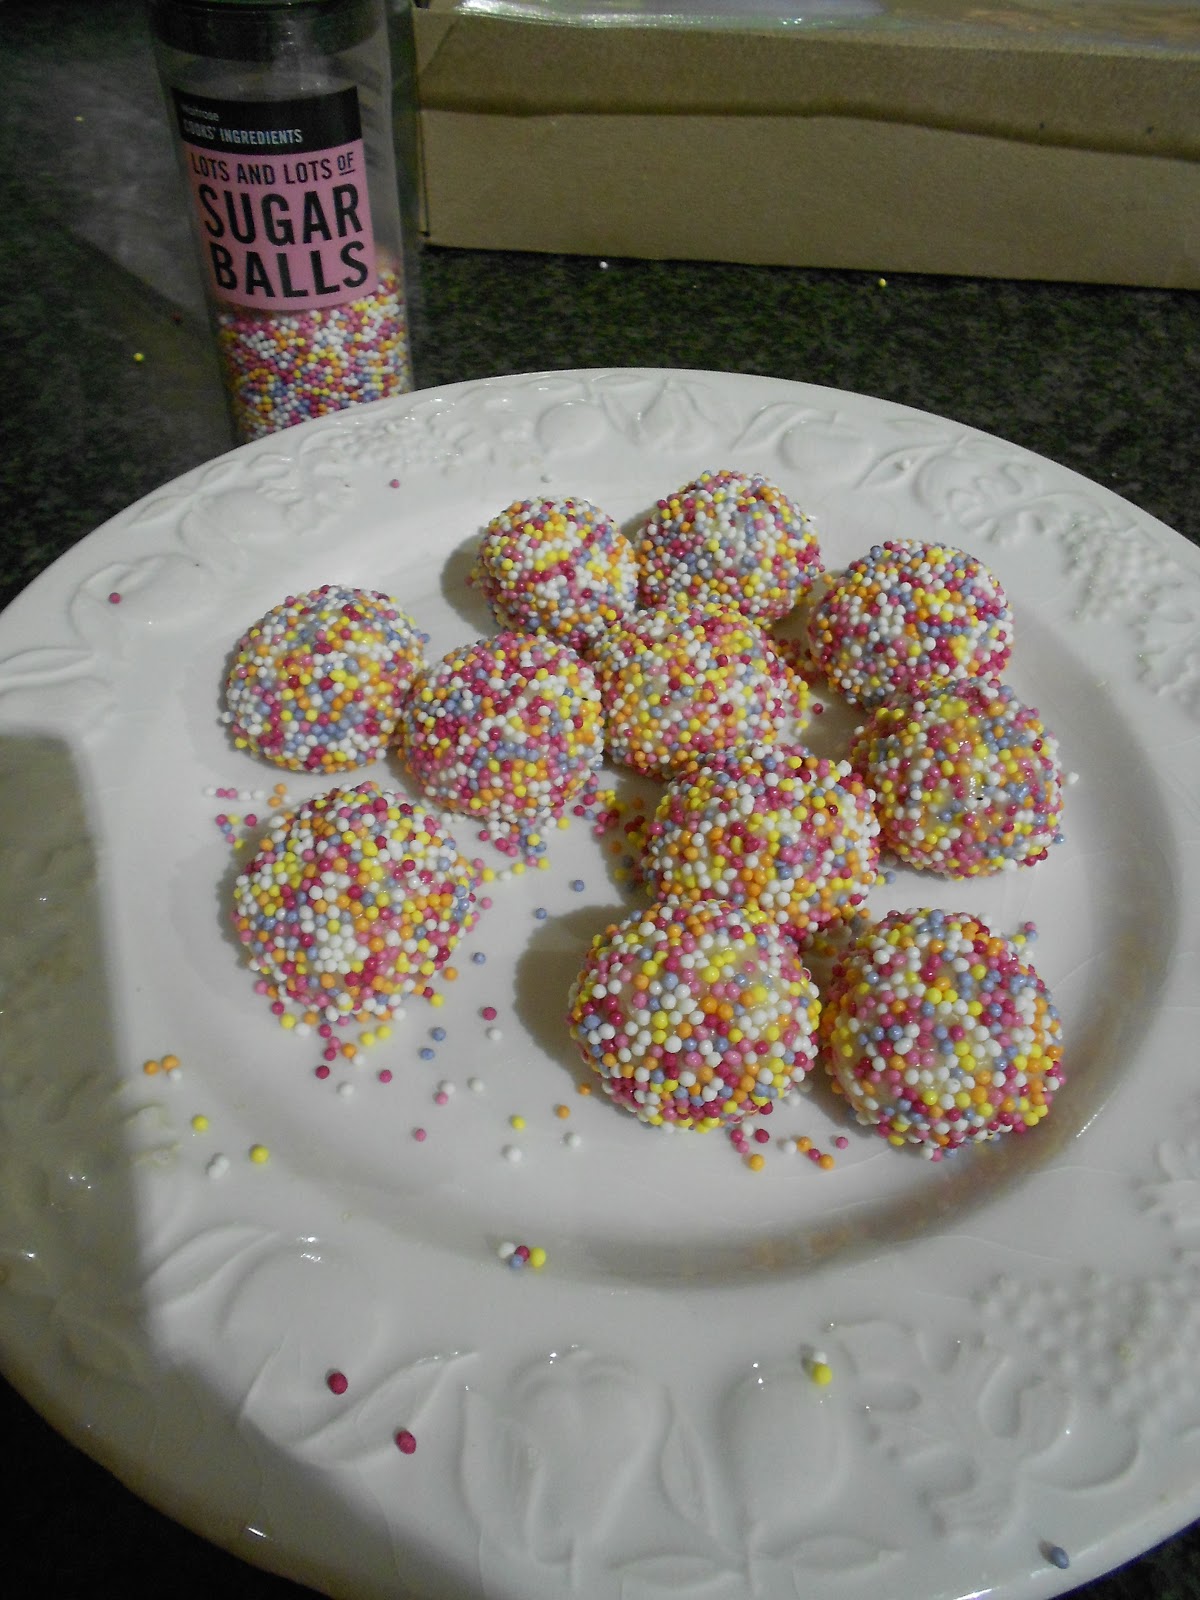
Twinkly White Vanilla Truffles
100g white chocolate
30ml double cream
1tsp vanilla essence
decorative sugar balls/sprinkles

1) Repeat steps 1-3 from the first recipe, substituting the tsp of vanilla for liqueur.
2) Freeze the ganache for half an hour, until just firm.  Scoop into balls with teaspoons and mould in your hands.  You washed your hands, right?
3) Scatter sugar balls into a bowl.  Turn out truffles into the bowl and roll in the decoration. 

N.B. White chocolate gets its distinctive colour from containing almost no cocoa solids.  This means that it melts more easily and needs less cream to make a satisfying ganache.

Trebor Extra Strong Snowballs
You Will Need: Pestle and mortar
100g dark chocolate
50ml double cream
3-4 Trebor Extra Strong Mints

1) Make the ganache as for Cherry Truffles, witholding the liqueur.
2) Pour into moulds and freeze for half an hour to set.
3) Crush 3-4 mints to fine dust in a pestle and mortar; roll the truffles in the dust until coated.

Coffee Truffles
You Will Need: sieve
100g dark chocolate
70ml double cream
1 tablespoon fine ground coffee


1) Chop 100g of the chocolate finely.  Put in a small bowl to mix.
2) Heat the cream with the coffee granules gently, stirring, for a while to allow the coffee to infuse.
3) When the cream is hot and coloured, pour it onto the chocolate through the sieve.  You don't want grit in your chocs.  Stir until the choc and cream are well blended.  Not all of the cream will come through the sieve.
4) Pour the ganache into moulds and chill until firm, or chill and roll into balls.

To Present
A square of cellophane or paper 8ins on each side will just envelop eight truffles comfortably.  

Wednesday, 19 December 2012

Aran Cardigan finished article


It's finished!  Here I am modelling my big fluffy item on my Dad's incredibly expensive Italian sofa, posing pretentiously.  I'm particularly pleased with the sleeves, as I'd got my cable-eights really sorted by then. 

Sadly the acrylic yarn I used is not bobble-resistant at all, but it doesn't seem to shed; its moth-resistance will have to be tested later in the year when it gets put away for the summer.

My next knitting commission will take me a good long time; a friend of mine wants a 'sexy cable-knit' which is 'yuppie-y, but not too much' and the pattern I have gives the required gague in cable-stitches, so I will have to swatch like mad.  If I have any crafting-budget left over after the holiday season, I can feel more needle-felting coming on.  It's high time I combined it with beads to make easy, Simple birthday presents to last the rest of 2013.


Saturday, 8 December 2012

Joining Ends Of Yarn With A Felting Needle


A very Simple quickie today - ever had this annoying situation?  You get to the end of a ball of wool, but you're still in the middle of working a piece?  There are lots of ways of joining the ends of a new ball into your work; my favoured method used to be the 'leave the dud end on the wrongside and pick up the new thread like nothing happened' method.  Then you knot the loose ends together and skim them in at the end.

This is inferior!  Now that I have my felting needle and mat, I can do this - all without getting up from my armchair:


Just stab until melded.  You'll have one or two fatso stitches on your rightside, but who likes skimming in ends?  Nobody.  Who likes stabbing fluffy things?   Ok, rhetorical....

Tuesday, 4 December 2012

Needle Felted Bunnies (Twee and Rock)


Since I discovered needle felting, the most Simple and adorably fluffy craft ever, I've been compulsively making stuff until I ran out of wool.  This included a pair of bunnies, one of whom has a little guinea-pig friend, as presents for the adorable twee- and rock- bunny-loving people in my life this festive season.  Follow the pics for a simple-as step-by step!