I haven't posted for a while, and after visiting my old friends in Cambridge who apparently read this blog I felt as though I was neglecting the Interwebs by not writing. Unfortunately the curry-cake saga has been postponed by work and the re-doing of the kitchen at my house (hurrah!) but I felt that I still had some knowledge to offer this week for anyone to try.
It's a statistic that I've picked up from somewhere that the majority of suicides are committed on Wednesdays (not Mondays, as it is apparently often assumed). They're far enough away from the weekend on each side, in the past and in the future, that neither your memory nor hope of time off is enough to console you through the long day at work. In my time I have been lucky to learn how to set this deadly Wednesdayness at bay, and you will not be surprised to learn that the key thing is food.
When I was working for a literary scout in the Easter holidays, my second year of university, I was the lowest of interns, given all the most druge-worthy tasks. The one light at the end of this tunnel other than the mantra 'it'll look great on my CV' was Wednesday lunchtime, for this was the day of Sushi. I had never really tasted sushi before this. Across the road from the office was a little restaurant, where generations of up-and-coming young people like myself had taken it in turns to shuffle over the road, carefully order the bosses' preferred dishes, and then wait forty minutes before shuffling back again to get the fishy goodness. The staff were friendly enough, but in the reserved and very quiet East Asian way which made me frightened to raise my voice or even speak to them beyond asking for a receipt.
The meal would be brought to a large table in the lower office, and carefully laid out. Everyone had their own pot of soy sauce, their own plate of delicacies and pickled ginger, including me. For two hours, we would sit and eat (some more awkwardly than others) whilst the most exciting books of the week were discussed. Some people disliked pickled ginger, so I was given theirs as well - heaven! I had never known such succulence, salt and excitement could be packed into one meal, which looked so elegant and healthy at the same time (although I'm sure a diet of nothing but sushi would be incredibly draining.) Wednesdays became the highlight of my working week, and when they were over I had the weekends to look forward to as well.
It doesn't have to be sushi. At my next job, I allowed myself the luxury of a bought pot of soup rather than my usual homemade, rushed sandwich or some real hot leftovers on Wednesdays, to keep up the tradition and my spirits. It had become a day of treats. Yesterday I had a piece of carrot cake from Pret a Manger, just because I could. However you can, I recommend you do the same, and watch as your working life becomes that much sweeter.
Thursday, 21 October 2010


Wednesday, 13 October 2010
Korma cake, Korma 'Shortbread'
For this curry, I tried two different approaches to the problem. The cake which I made was popular with some, but others complained that it was a little too dry and crumbly for their taste - so I made a 'shortbread' biscuit as well to take advantage of this property. Here are both recipes, presented for your benefit - I hope you enjoy both of them.
Korma Coconut Cake with Turmeric Yoghurt Topping
200g ground almonds
100g dessicated coconut
100g butter
150g caster sugar
3-4 tsp ground ginger
1/2 tsp chilli powder
2-3 tsp coriander
1/2 tsp garam masala
250ml pack of creamed coconut, drained
2 eggs
150g self-raising flour
_____________________
100g yoghurt
4 tablespoonfuls icing sugar
1tsp turmeric
Line a loaf tin with a strip of greaseproof paper. Preheat the oven to 180 degrees Celsius. 'Breadcrumb' the first four ingredients by rubbing the lumps of butter between your fingers until you have an even crumbly mix. Mix in the spices. Drain the packet of creamed coconut (available in Sainsbury's, or 'all good supermarkets' in the 'foreign food' section) by cutting off a corner and pouring the watery substance down the sink. Squeeze out all the creamy toothpastey coconut goodness into the mixture. Mix; add the eggs, and the flour a little at a time. Bake for approx. one hour; check every 15 mins. and if need be put a tinfoil 'hat' over the tin if the top looks like burning. Make up the icing and 'ice' the cake dribble-fashion when cool.
Korma 'Shortbread'
This recipe is based on the BBC Food recipe for generic shortbread, with key korma ingredients added, so some of the credit must go to Auntie...apologies for the Imperial measures for those metric fans among you, it won't happen again! It does make doubling quantities easier though should the recipe prove especially popular ;)
1 ounce ground almonds
1 ounce dessicated coconut
4 ounces butter
2 ounces caster sugar
4 ounces plain flour
1/4 tsp chilli powder
1 tsp coriander
1/4 tsp garam marsala
1/4 tsp turmeric
Preheat the oven to 190 degrees C. Line a baking tray with greaseproof paper and lay out a cooling rack. Beat the butter and sugar til creamy. Stir in the dry ingredients and spices. Mould together into a dough; wrap in clingfilm and chill for 15 minutes in the fridge. Take it out of the fridge, shape into approx. 8 big fat fingers with your hands and prick each one with a fork 3 times (you know, the way it looks in the shops with holes in.) Bake for about 15 mins til golden brown and cool them on the rack. Careful, they're crumbly!
Next Week: Biriyani...
Monday, 11 October 2010
The Quest for Curry Cake Continues
Well, as the Kashmiri Carrot Cake went down so well with all who sampled it this weekend, I am determined to continue my suspiciously sober quest for an actually curry-hot-tasting cake. Today I have been exploring the Interwebs for a definitive list of possible curries to emulate, and have come up with the following Plan of Action, moving from mild to spicy up to a terrifying End Boss:
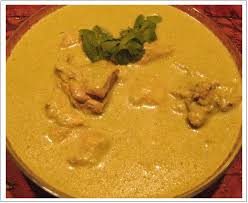
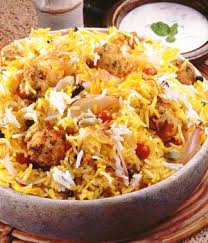
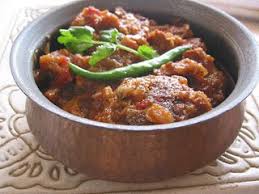

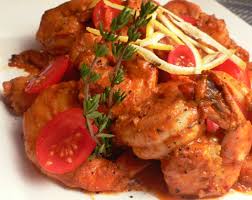

- Korma Cake. Based on a coconut sponge recipe, this cake should be relatively easy to make work, incorporating creamed coconut, ground almonds, ginger, chilli, garam masala, black pepper and turmeric with a sweet yoghurt icing.
- Biriyani Cake. This is a rice dish used as a side, so this cake will have to incorporate boiled rice, as well as almonds, sultanas, cinnamon, cardamom and a bay leaf. Technically it's probably less hot than the previous two but the rice makes it adventurous.
- Dopiaza Tart. Literally 'onions twice,' dopiaza uses onions as its basis in large and small pieces. I plan to flavour a pastry with one 'set' of onions, and make a sweet caramelized onion filling for a spicy tart.
- Dhansak Cake. The first recipe to use a significant amount of chilli powder, this might be a tricky one - but I am determined to try. The significant ingredients are lentils (which have no taste and will add texture,) chilli powder, sugar and lemon juice - and as the Taste Triangle theory reminds us, both sugar and lemon juice go with 'cake' - so why not the remaining player? We shall see...
- Madras Tart. I resort to tarts here because I already own a recipe for an Italian tomato tart, which is admittedly a savoury dish but proves that tomatoes and pastry are a good combo for texture and taste. This should be a really quite hot pudding but I hope that the natural sugars of the tomatoes and anything else I add will bring out the chilli's real flavour, not just the tongue-scorching element.
- Vindaloo Cake. I ran into trouble with my research here - a traditional Goan vindaloo apparently contains wine or wine vinegar, and garlic, neither of which fit into any taste triangle with cake which I can think of - yet. Helpfully there exists the British Indian Restaurant version which usually uses chilli, potato, lemon and black pepper. The potato can be missed out as it is a misinterpretation of the word 'aloo' as Indian for the Portuguese 'garlic.' Lemon+cake = yum, chilli+cake = ? black pepper+cake = ? Truly this will be a fitting End Boss for my Quest. Perhaps I shall have to use chocolate as my Ingredient of +4 Yumminess!
Thursday, 7 October 2010
Curry and Beer makes for a very interesting Carrot Cake
A general rule of cooking is: When drunk, many things seem like a good idea which will later prove to taste like unto that which usually goes down a toilet - which is where the ill-fated dish ends up. Recently a trip to the local Curry House prompted a conversation which went something like this:
- If only pubs had curry on tap, to go with your beer.
- If only that curry was Mr. Whippy style.
- Hey, you could serve it in cones made of naan bread or very thick poppadoms.
- With a chilli chocolate flake!
- Hang on... what about curry IN CAKE FORM... everyone loves curry, everyone loves cake, right??
For once this drunken curry-based line of reasoning didn't sound so bad when sober, mostly because of a little thing someone (also in a pub) called the Taste Triangle: a theory that if A goes with B, and B goes with C, that A and C may well go together as well - chilli and chocolate, chilli and tomatoes, chocolate and tomatoes? It's Heston Blumenthal territory to most of us, but in this case I didn't see why garam masala, or another 'sweet' spice such as cardamom or caraway, shouldn't be added to a carrot cake.
Kashmiri Carrot Cake
N.B.: The following recipe yielded a rather stodgesome loaf most suitable to eat with a cup of tea in hand, or perhaps some coconut icecream. For a lighter version perhaps more self-raising, more rigorous beating and less mixture-per-tin might yield a less dense experience, but it will be up to you to experiment.
approx. 350g carrot, grated
half a small red onion, finely chopped
100g apricots, shredded
100g raisins
50g dessicated coconut
3-4 cm fresh ginger, finely chopped
3 fresh eggs
4-5 tablespoonfuls of olive oil
200g dark brown soft sugar
approx. 250g self-raising flour (you may want more than this.)
2 1/2 teaspoonfuls of garam masala
pinch salt
------------------------------------
pack cream cheese
2 tablespoonfuls icing sugar
coriander leaves, finely chopped
Preheat the oven to 180deg. C and line a loaf tin with a strip of greaseproof paper so that little 'handles' poke out of each end. Mix together all the fruit, veg and spice in a large bowl; add the eggs and oil and stir to incorporate. Mix in the sugar. Add the flour about 50g at a time, until you've reached a thick gloopy consistency; get it in the tin and bake for about 1hr20mins, or until a skewer through the very middle comes clean. You may find yours needs less than this as my oven is quite unbalanced, baking the back more than the front.
Beat the cheese, coriander and icing sugar together in a bowl until smooth and chill in the fridge until you need to ice the cake.
As a side note, this really rather deliciously unusual confection was made using a Global kitchen knife, which is what your teaspoons imagine the face of God looks like. When I say 'shredded' apricots, I mean you will not believe how wonderfully sharp and easy to use these things are. Get one.
Tuesday, 5 October 2010
Elderberry vodka
You may remember that last month I encouraged everybody to pick elderberries as well as blackberries for making tasty things with. Well, it's now October, and impatient little minx that I am I have brought my booze out of its vats a month early and bottled it in its final form.
When I picked my elderberries in mid-August I had about 800g of them, and decided to make a liqueur by using them to flavour some vodka. I'm a sucker for purple booze! A litre of vodka was therefore bought and I simply chucked all the ripe berries into it, sealed the containers and added sticky labels encouraging me to NOT OPEN TIL NOV. 15TH to allow for maximum flavour.
Needless to say the stickies did nothing - I was too tempted to move on with my experiment! Today I filtered out the berries from my vodka, heated it gently in a large pan and added about 200g of sugar. I wanted quite a strongly flavoured drink this time round (my blackberry liqueurs were very jammy) but you could add more sugar per litre if you like - just keep tasting 'til you go yum!
When bottling, stand the bottle on a wad of kitchen towels and ladle into the bottles through a funnel if your pan has no spout. This should minimise drips.
This all yielded a little more than 1L of finished product, which means I got to use a very small and unusually-shaped bottle for the excess which might make an amusing Christmas present for someone. Come to that, small jars of jam or chutney or bottles of interesting drink would all make amusing Christmas presents, which should be another encouraging reason to get crafty!
Saturday, 2 October 2010
Return of the Chutney / Son of Chutney

Simple Yellow Plum Chunky Chutney
2lbs yellow plums (stones in)
10-11oz cooking apples, chopped (no peeling required)
10-11oz white onions
8oz (approx) apricots, chopped into at least 8 pieces each
3/4 pint red wine vinegar
8oz dark brown soft sugar
10 black peppercorns
2tsp salt
2tsp cumin
tsp ground ginger
tsp garam masala
Stone the plums and chop them into shreds. Chop the apple, onion and apricots as small as possible, and chuck all the ingredients in a big pan. Simmer on the hob's lowest heat for as long as it takes to thicken - you should be able to draw the spoon quickly through the chutney and catch a glimpse of the bottom of the pan. This took 2-3 hours for me I seem to remember, but I was listening to radio 4 at the time.
Sterilise your jars and pot the chutney while everything's still hot. Having used up all our old jars during previous efforts, I ordered a set of 32 off the internet from this site: http://www.jbconline.co.uk. They've got a selection of large, small, Kilner and Le Parfait jars and bottles to suit everyone, at relatively knock-down bulk prices. It's a damn sight more expensive but less faff than buying 17p curry sauce from Sainsbury's and pouring the contents down the loo, as the boyfriend once suggested!
Sunday, 26 September 2010
Embroidery 'sans frontieres'

It's easy to get scared by the idea of doing embroidery; needles are both fiddly and pointy, mistakes are easy to make and difficult to attend to, and it isn't often done these days so guidance from elder relatives can be sparing. However - after an obsessive cross-stitch phase in my childhood, I became determined to take up my needle again, and so I offer this pictorial evidence of what you can achieve without a pattern from a kit.
Learning to sew in itself is a bit tricky for me to show you just on a blog, but there are lots of books and old people around who could teach you the basics. For masterpieces such as above, You Will Need: Scissors, fine white cloth of any kind, coloured embroidery thread (try John Lewis), needle, small embroidery hoop (ditto), computer and printer, pencil and strong black pen.
Decide on your image. I wanted a goldfinch because birds make good stand-alone subjects and come in interesting colours. A great tit was abandoned after the embroidery hoop pulled the pattern out of shape. Print out your images in black and white or colour and trace them with the black pen onto a separate sheet. If you can't see the image through the paper do your best to sketch from example with your pencil, then go around the outlines with the pen. Cut out the pen drawing.
Place the drawing behind the cloth and fit the cloth into the embroidery hoop so that you can see the pattern through the cloth. If you can't, hold it up to a window or light to remember your way. Make sure that the hoop is aligned properly and the cloth pulled tight. Begin sewing with fine black thread, using backstitch, along all the outlines.
When you've finished the outlines of your image, you don't need the paper pattern any more. Take the work out of the embroidery hoop and carefully cut or pull away the paper from the back of the work (if it won't come easily, no worries - it won't show later). Most of the edges will have been nicely perforated by your sewing earlier. When the paper is mostly or all gone, put the work back into the hoop and fill in the blocks of colour using long and short stitch.
This way you can make any image you like, or even, if you're a better draughtsman than a sewer, design your own. For a first try choose a small, simple subject which doesn't have too much fiddly detail. There are three key things to remember about doing needlework of any kind:
1) Never use a thread longer than your own arm. When pulling from a bobbin or skein, hold the body of the thread in one hand near your chest, pull out the length you need with your other hand, and stop when your arm is fully extended. Cutting the thread with your teeth means that the end is already wetted to push easily through the needle, and you don't have to let go to get your scissors. When you have this long thread, pull about half of it through the needle so that you're only working with a short length at a time.
2) While you're sewing, occasionally let the thread lie on the surface of the work so you can see it curling up. Then twiddle the needle in the opposite direction until the thread lies flat. This reduces the chance of tangles happening when you pull through the material.
3) If you do get a tangle, don't panic! Either snip it out, which is cowardly but effective, and remember to tuck the cut ends under new stitches so that they don't unravel - OR - very slowly tug on each loop and you may find that the culprit is one small loop which simply undoes when the thread is gently pulled taut. Then dangle your needle to untwist the thread and start again.
Wednesday, 22 September 2010
Chutney update...
So, the slow cooker may after all have been a bad idea. Its small base and lid have not been conducive to the evaporation of the vinegar; perhaps next time I shall add even less vinegar than I did - half-quantities - to speed the process. After boiling for 7 hours, the chutney has now been jarred in good ol' recycled honey pots, sterilised by washing and putting in an oven heating up to 150 degrees C. Hopefully once it's cooled, it'll look thicker than it is.

Mek Chutney all daaaay...
'Bees make honey, and this is an amazing thing - we never think about it but it's an amazing thing! Do spiders make gravy? Do earwigs make chutney?'
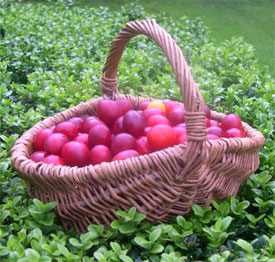
I have paraphrased, but this is Eddie Izzard's wonderful stance on chutney, which I have decided to make myself. I am not an expert earwig, so I have turned for my chutney recipe to a wonderful blog called the Cottage Smallholder. Their recipe for plum chutney can be found here, and I have a batch of it (minus the apricots, as I didn't have any) in the slow cooker at the moment. I am using half the amount of vinegar specified, as the slow cooker tends to conserve a lot of the liquid in any dish.
I ought here to mention two people who will have made this chutney possible. My wonderful boyfriend D (who also prompted the invention of a chutney rather than jam, as he loves cheese) bought me the slow cooker for a birthday present about two or three years ago, for cooking at university. It has served me well during that time, and I am delighted to discover on the internet that it may be possible to slow-boil such preserves in one rather than on the hob.
The second person is my friend V the Bearded Bat-Woman of the Night, who allowed me to plunder the extensive orchards of her Oxfordshire home for damsons, yellow plums, hard pears and cooking apples. I shall be trying to condense this plunder into multiple jars of multiple kinds of jam and chutney over the following days, for multiple purposes.
 |
| from the Cottage Smallholder website |
I have paraphrased, but this is Eddie Izzard's wonderful stance on chutney, which I have decided to make myself. I am not an expert earwig, so I have turned for my chutney recipe to a wonderful blog called the Cottage Smallholder. Their recipe for plum chutney can be found here, and I have a batch of it (minus the apricots, as I didn't have any) in the slow cooker at the moment. I am using half the amount of vinegar specified, as the slow cooker tends to conserve a lot of the liquid in any dish.
I ought here to mention two people who will have made this chutney possible. My wonderful boyfriend D (who also prompted the invention of a chutney rather than jam, as he loves cheese) bought me the slow cooker for a birthday present about two or three years ago, for cooking at university. It has served me well during that time, and I am delighted to discover on the internet that it may be possible to slow-boil such preserves in one rather than on the hob.
The second person is my friend V the Bearded Bat-Woman of the Night, who allowed me to plunder the extensive orchards of her Oxfordshire home for damsons, yellow plums, hard pears and cooking apples. I shall be trying to condense this plunder into multiple jars of multiple kinds of jam and chutney over the following days, for multiple purposes.
Sunday, 19 September 2010
Leftover Apple Tartlets


Remember that I told you to save the cocoa pastry from the Exploding Blackberry Tart? These little babies use the leftovers from making that, and any Bramleys you have left over from making jam, to avoid waste and encourage tastiness...
Leftover Apple Tartlets
Preheat the oven to 180 degrees C. Grease a cupcake tray. Roll out your remaining pastry to about 2-4mm thickness and cut into circles with a floured wineglass (if, like me, you don't have round biscuit cutters!) Bake these cases for 5-7 minutes, then take them out again.
Meanwhile, peel and core the apple(s). Slice off very thin slices equal to the number of cases you have (I had seven.) Put these aside for later. Very finely chop the rest of the apple, put in a saucepan with a splash of water, a knob of butter and generous sprinkle of sugar to cover the surface. Cook, stirring gently, until mushy, then add to the pastry cases.
Place a slice each of reserved apple over the filling, and sprinkle with more sugar. Bake another 5-10 mins until the apple is hot and browned at the edges.
Fin!
Sunday, 12 September 2010
Blackberry and Apple Jam


Jam jam jam, jam jam jam, nom.... eugh....
Black Books quotes aside (if you don't know what I'm talking about, go and find out) this jam is definitely not eugh. It is my mother's own recipe, and I have been highly aware of its production since a very young age. I first remember picking blackberries specifically for jam at a place called Hole Cottage, once owned as a holiday home by the Landmark Trust but now I believe sadly sold. It was during our stay there, chopping and fetching wood for the real fire, reading a lot of books, going on a lot of walks and drinking tea from the (always identical) Landmark Trust tea-set, that the Blackberry Jam Song was first composed. The brambles, as always, were full of spiderwebs, the path, as always, along which they grew was strewn with the detritus of passing dog-owners, and Mum sang out to us wee ones as we worked:
'Spider-jam, spider-jam,
nur-nur-nehneh, Spider Jam
Mind the poo - on the path
or you'll have to, have a bath
Watch out!
Here comes the Spider-Jam,'
to the tune of Aerosmith's Spider Man. It became a firm favourite immediately, and in honour of the incident I have labelled the first two bottles of my blackberry liqueur 'Créme d'Araignée,' or 'Spider Liqueur.'
Mrs. Dawson's Blackberry and Apple Jam (proportions)
4 lbs (spiderless) blackberries
1/2 pint water
1.5 lbs peeled, cored, finely sliced cooking apples
6 lbs caster sugar
(knob of butter - I missed this by accident, but it seems to be optional.)
EDIT: Thanks to the interwebs, I now know that the knob of butter is apparently added at the last minute to reduce the appearance of scum, but I didn't spot any on mine, so do as you like.
Put a small saucer in the freezer with a couple of icecubes on it. Trust me, you'll need it later.
Simmer the blackberries in 1/4 pint of the water until soft, which won't take long. Simmer the apples meanwhile in a larger pan in the rest of the water until soft, then mash them. Add the blackberries and the sugar to the apple pulp, stir til the sugar has dissolved, (then add the butter.) Bring to a rolling boil and boil 10 mins.
TOP TIP: At this point the whole thing will become Extremely Bubbly as you can see in the pictures and difficult to stir without injuring oneself. I ended up wrapping a teatowel around my hand to protect myself from boiling sugar splats. It disturbed me somewhat that I never saw Mum doing this, but perhaps she used a longer spoon.
After 10 mins take the saucer out of the freezer and blob some of the jam onto it. Does it bind together into a proper jammy blob when cooled? If not, just keep boiling a bit more. If so, skim any scum off the top of the jam, and pot into clean jars. If you don't have clean jars, as I didn't, endeavour to make some, as I did:

Tuesday, 7 September 2010
Exploding Blackberry Tart


For the Pastry:
c.30cm tart tin
200g butter
pinch salt
40g icing sugar
40g cocoa powder
1 egg
teaspoon vanilla
c. 200g plain flour
Cream the butter, almonds, sugar and salt. Add the vanilla, beaten egg and 1 tablespoon of the flour. Slowly incorporate the rest of the flour to make a ball of dough which comes away cleanly from the sides of the bowl (use more flour if need be.) Wrap in clingfilm and fridge for one hour.
Preheat the oven to 180 degrees C. Roll out the dough to a circle about the size of the tart tin, flouring the rolling pin, pastry, surface and your hands very well. Use this technique to get it into the tin:
http://www.bbc.co.uk/food/techniques/lining_tin_with_pastry
Prick the bottom of the pastry base all over with a fork; this will allow any air bubbles trapped underneath to escape and not make unsightly lumps in your bottom :) Bake for 10 minutes while you mix up the sponge.
TOP TIP: If you have any pastry trimmings left over from making your tart base, wrap them up in clingfilm again, and keep in the fridge to make Leftover Tartlets - coming up in a new post soon.
For the sponge:
1 large egg, beaten
3oz butter, plain flour, caster sugar
handful of dessicated coconut or two
Cream the butter and sugar, and gradually add the beaten egg. Stir in the coconut, then gradually add the flour to make a smooth batter.
To assemble:
Take the tart base out of the oven, and spoon in the sponge mixture, spreading it out evenly. Now sprinkle over some blackberries, washed of course, until the surface is evenly covered with fruit. Stick it straight back in the oven for about 25 minutes, or until golden brown and exploded. (by which I mean the individual fruits will have burst, spilling their lovely flavours into the sponge!)
While it's cooking you could melt some chocolate to drizzle over the top, or take some vanilla icecream out of the freezer to make it easier to spoon alongside. Bon appetit!
Subscribe to:
Posts (Atom)